Explore GameReplays...

Dark Crusade

Eldar Infantry Guide*

Closed Topic Start new topic
# 1GW_Fingolfin Aug 23 2007, 19:58 PM
Attached Image
A Guide by GW_Fingolfin

________________________________________

Tier One Infantry

Bonesinger
Guardian Squad
Ranger Squad
Howling Banshee Squad
Dark Reaper Squad

________________________________________

Tier Two Infantry

Fire Dragon Squad
Warp Spider Squad

________________________________________

Tier Three Infantry

Seer Council

________________________________________

Characters

Farseer
Harlequin
Avatar

________________________________________

Misc

Replays


This post has been edited by GW_Fingolfin: Aug 30 2007, 19:30 PM

Posts: 1,541

Game: Dawn of War 2


+
# 2GW_Fingolfin Aug 23 2007, 19:58 PM
Bonesingers

The Bonesinger is the Eldar builder unit. With Teleport, the ability to engage troops in combat, and the Wraithtomb ability, coupled with lower repair costs this unit really is useful and should be optimised when playing Eldar. Always remember to consider its other uses rather than just as a builder. You can tie up ranged units, teleport to obscure places to set up a secondary base, teleport to make quick repairs, or place turrets in offensive positions. You can also use them to scout enemy builds and positions on the map by teleporting or engaging builders in combat to slow down tech or force defence. In essence the Bonesinger is much more than a builder and if used properly has some nice tricks.

Attached Image


Statistics

Pretty standard statistics, the Bonesinger does not really have any special features to note other than its low health and quick build time. However the main change since 1.1 is the fact that the Teleport ability now starts at half recharged. Here are the Bonesingers statistics from Relic Wiki:

Build Cost 45/0/0
Build Time 6 seconds
Built From Webway Assembly
Squad Size 1
Requires Webway Assembly
Limit 4
Hitpoints 215/1
Armour Infantry Low
Morale 200/10/50
Unit Mass 10
Move Speed 16
Sight Radius 25 (cannot detect)

Its low health and morale mean that it can be taken down fairly quickly by capping units such as scouts so be careful and use the teleport ability if you need to make a quick escape. You can build 4 Bonesingers, in most case starting with two and using the others in later game for repairs or tying up ranged units/scouting. Remember that using 3 Bonesingers to create one building is a waste of time as you only receive a time bonus for the second builder, anything after that is negligible.


Upgrades/Abilities

Teleport

Starting half charged on the Bonesinger creation, you can no longer teleport for turret rushes or big generators straight away. With a cool down of 120 seconds (2 minutes) use your teleport carefully and try to utilise it so you are using your Bonesingers to their best potential. The ability has a range of 150, allowing you to teleport into enemy bases on smaller maps such as blood river and easily to critical map points; utilise the range and don’t waste a teleport for short distances unless fleeing ranged units.


Wraithtomb Attached Image

A really good ability that not many people use; Wraithtomb allows a Bonesinger to cast a web over a structure which halts its production, research and any building guns for 30 seconds. This may seem like an insignificant time, but periodical use can slow down the tech speed of your enemy or allow you to take down LP’s or turrets without receiving damage.

For merely 50 req and 25 power, this ability should be bought often and used to slow down your enemy. Think of it this way; if you can find no other possible way to use your builders then you might as well jump into the enemy base and try to slow them down using Wraithtomb. It provides a distraction and hindrance to your enemy for a cheap cost and relatively little micro.


Strategies/General Tips

As a builder, your Bonesingers primary use at the start of a game is for construction of unit producing buildings and LP’s etc. You can send one to scout your enemy at the start and engage builders in combat (this strat became less viable in 1.2 due to the half charged teleport). In later tiers remember to use their teleport to scout your enemies' unit production and tech progress as well as jumping in to tie up ranged units and repair vehicles.

Attached Image


A vital point to remember is the Bonesinger repair cost and amount. All other races repair cost for builders is 75% of their original unit cost. The Bonesinger repairs for a mere 20% of the unit's original cost making it much more cost effective than other races. Its repair rate is average at 30 HP per second putting it in-between the weaker heretic and stronger Tech priest.

Tying up attacking units can be a great way to use your Bonesingers. Top Eldar players will utilise their Bonesingers to stop such anti base units as Fire Dragons from being able to effectively stay on ranged by engaging them in CC. Although the BS will not stand up to much damage they can be very useful for delaying units.

This post has been edited by GW_Fingolfin: Aug 30 2007, 19:39 PM

Posts: 1,541

Game: Dawn of War 2


+
# 3GW_Fingolfin Aug 23 2007, 19:59 PM
Guardian Squad

Guardians are civilians from Eldar Craftworlds drawn from other walks of life into the path of military service. Armed with the basic Shuriken Catapult and combat knife, together with basic armour your standard Guardian is fairly weak compared to other races capping units. However with enough numbers and a small investment in a Warlock and a couple of upgrades, an Eldar player can use the Guardian squad to deadly effect to gain map control and to help out in defence/harass. Very mobile as with all Eldar squads, the Guardian can quickly cover the map to cap critical locations our scout out enemy movements. With a Warlock leader, the squad’s damage, morale and morale regen are all boosted as well as being able to detect; making the squad very valuable against races most likely to utilise infiltration. Furthermore with the Mysticism upgrade from the Webway assembly a guardian squad can tie up enemy squads using entangle, use embolden to boost their morale, and will benefit from the conceal ability; reducing their ranged damage intake by 25%. Remember the Plasma Grenade research also; this provides some extra punch and the addition of disruption to enemy infantry. Many Eldar players under utilise their Guardian squads; they are a really useful unit and should be considered with due thought as your other squads due to their potential when used correctly.

Attached Image


Statistics

As a standard capping unit, a Guardian squad is fairly weak especially it’s building damage and combat abilities without a Warlock Leader. When facing other capping squads it can hold its own if reinforced properly, however against such units as Sluga squads you will need a Warlock and some decent micro. Here is their statistical breakdown from Relic Wiki:

Build Cost 130/0/2
Build Time 16.8 seconds
Built From Webway Assembly
Squad Size 4/9
Requires Nothing
Limit None
Reinforce Cost 30/0
Reinforce Time 6.6 seconds
Hitpoints 210/1
Armour Infantry Medium
Morale 300/9/150
Unit Mass 10
Move Speed 16
Sight Radius 25 (Detection 30 with Warlock)

The first thing to note is their armour and morale compared to other capping units; they have more HP per member than Cultist squads and Guardsmen squads, but less than all the other capping units. Although stealth suits have 250 HP per squad member, a Guardian squad with Warlock will easily take out a reinforced squad. Again their morale betters that of a Cultist and Guardsmen squad, but is slightly lower than that of the other capping units (with a Warlock the Guardian squad has the best morale for a capping unit). There cost is slightly higher than other races capping units, mainly because they can have a leader straight away and their squad cap can be 9 making it a fairly hardy unit compared to such squads as scouts who can only have 4 members.

As Eldar’s only source of detection (except turrets) in tier one until the harlequin in tier two, Guardian squads are especially useful in such matches as the Eldar mirror for detecting Rangers and Tau for harassment of Stealth suits to deny them easy map control. When facing these particular races you should always have Warlocks in your Guardian squads at the start; the cost in power is worth it for the possible damage you can do.

Their reinforce time is just 6.6 seconds which allows you to easily keep a squad to good numbers when under fire; however if you are Overwatching a squad be careful and monitor how much you are spending on it as you can soon use a chunk of your requisition that could be used elsewhere. A full Guardian with Warlock costs 335 requisition and 15 power and with the upgrades even more; this is a well invested cost however as when used right Guardians will make back their cost. In all matchups you should start with at least two guardian squads; these will cap your base points and then move out for map control to the critical locations/relics while your Reapers/Rangers attack/defend. Some players use three Guardian squads at the start with rangers as the first unit from the Aspect portal; this makes a solid start and once your first Guardian squad has capped a point you can send it in (with Warlock) to help your Rangers harassing. There is also the hard Guardian build; with this you start with 5 guardian squads and get the Mysticism and Plasma Grenade upgrades to form a hard and quick rush in tier one.

In later games guardians are excellent for several reasons. Firstly they can be used to defend your base from infiltrating units; keeping a squad in your base with a Warlock allows you to easily detect invisible units while concentrating with your main force. Secondly you can use them to cover critical locations from units attempting to decap; this can easily help your map control as in the later tiers, your guardians will have benefited from the optics and armour upgrades. Finally you can use them for tying up heavy ranged units such as obliterators and Firewarriors in melee; a fully reinforced Guardian squad with warlock at that stage will last for a while, giving your Warp Spiders the chance to take out the unit.


Upgrades/Abilities

Warlock Leader Attached Image

A vital addition to a Guardian Squad and in most cases a Warlock should be added to the squad straight away; its boosts the squad’s morale and damage output as well as detecting infiltrated units. One thing to consider is the Warlocks build time; at 30 seconds and for 55/15, an Eldar player must build the Warlock at the right time or the squad could take heavy losses. Never add a Warlock when a Guardian squad has low numbers; the build time could hamper your reinforce rate and the whole squad could be killed before the leader is built. Here is the actual bonus a Warlock provides:

- Adds 100 to squads maximum morale and 1 to the morale regeneration
- Detection Radius of 30
- Increases squad weapon damage by 20%

Furthermore when the Mysticism ability is researched the squad can use Embolden, Entangle and gains the conceal ability (reduces ranged damage by 25%). If an Eldar player wishes to make the most of their Guardian squads then a Warlock is vital; it allows the squad to perform at a much better level. Additionally the squad will be hardier in combat as the Warlock does fairly good damage with its Sword and Power sword (requires Mysticism). Here are the Warlocks abilities:


Embolden (Requires Mysticism) Attached Image – 
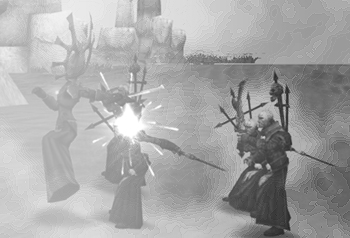
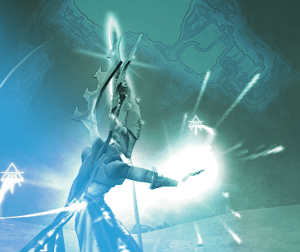
Once activated, the squad the Warlock is in will have their morale boosted by 200 for the whole squad; this lasts for 20 seconds. Key times to use this are when your squad has been broken or when fighting in a protracted battle where morale will be key to the Guardian Squad winning.

Entanglement (Requires Mysticism) Attached Image – With a range of 30, the Warlock snares an enemy squad in the Wraithbone; stopping their movement for 5 seconds. During this period squads cannot move or jump, however they can shoot and if they are in melee they will continue to fight. This ability is best used on weakened squads that are fleeing from a fight (much like chains of torment); after activating the ability, make sure you move your ranged squad in close to do maximum damage.

Conceal (Requires Mysticism) – A passive ability that is always activated once Mysticism is researched. The Warlocks uses its psychic powers to shroud the Guardian squad it is with allowing them to take less ranged damage. This translates to a 25% reduction in ranged damage to the squad (half that of the Seer councils conceal), however it also affects and attached Farseer.

Power Sword (Requires Mysticism) – After researching this upgrade from the Webway assembly the Warlock is equipped with a Power sword instead of its standard Sword. The Power sword roughly has double the damage capabilities to all armour and building classes compared to the standard sword and has a 65% accuracy.

Farseer Veteran/Hero Upgrades Attached Image Attached Image – 
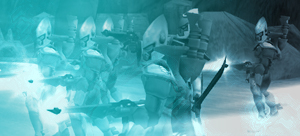
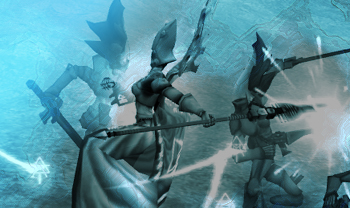
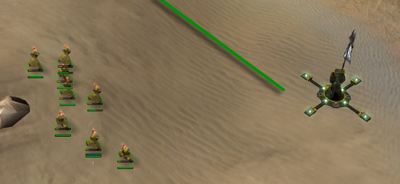
Both of the upgrades available at the Soul shrine in tier two also affect Warlocks in guardian squads. The first upgrade increases a Warlocks health by 150 to 400, and the second increases a Warlocks health by a further 150 to 550. It is not advisable to buy this upgrade solely for your Guardians as the Optics and Armour upgrades are more important, however it should always be considered.


Plasma Grenades Attached Image

Available at tier one from the Webway assembly for just 75/25, Plasma grenades are a useful tool for your Guardian squads and should be researched if you have three or more squads after fleet of foot is purchased. With a range on only 25 you have to get fairly close to an enemy squad to use it, however with the ability to stun a squad and knock back it is a useful upgrade to buy. Damage wise it does roughly 75-95 damage to all infantry targets (Note. It does not affect buildings). With a cool down of 75 you will get to use this item fairly often and it is best used against charging melee squads or retreating infantry. An Eldar player should also buy this when concentrating on a heavy Guardian strategy as it gives them some extra punch as well as disruption.


Improved/Superior Optics Attached Image Attached Image

As with all Eldar infantry (except the Seer Council), the Optics upgrades available at tier two and three benefit Guardian squads. You will be purchasing these upgrades anyway to boost your main squads such as Reapers and Warp Spiders however it is important to know of the bonuses a Guardian Squad receive:

Improved = Increases Guardians damage by 25%
Superior = Increases Guardians damage by a further 25%

In total with a Warlock a Guardian in tier two has a 45% damage increase and at tier three a 70% damage increase; this makes it the squad that can be boosted the most by upgrades. A significant boost for the guardian squad, this keeps them useful in later tiers as a defence against infiltrated harassers and in combat against ranged units.


Reinforced/Enhanced Armour Attached Image Attached Image

Like the Optics upgrade, the Reinforced and Enhanced armour upgrades available at tier two and three increase the health points of Guardian Squads. Again it is prudent to know what bonus the Guardian Squads receive:

Reinforced = Increase Guardians health points by 25%
Enhanced = Increase Guardians health points by a further 25%

Translated to actual figures this boosts them at tier two to 265 and at tier three to 329; this gives them roughly the same health as an un-upgraded space marine. These bonuses become most useful at the start of tier two if you are holding with Guardians, allowing them to survive longer while you get out more powerful units and again in later tiers when tying up ranged units, allowing them to survive longer in combat.


Strategies/General Tips

BO1 – Standard 2x Guardian build used in most matchups. From HQ que a builder then two Guardian squads and fleet of foot; the builder already out makes an aspect portal and que’s a generator, the second builder helps construction, the Guardian squads cap base points. From here you should get a Ranger squad and then Reapers. Your Guardians will continue to fight for map control at the relics and criticals and help out in the harass only if needed.

BO2 – Standard 3x Guardian build using Warlocks more. From HQ que a builder then three guardian squads and fleet of foot; the builder already out makes an aspect portal and que’s a generator, the second builder helps construction, the first two Guardian squads cap base points, and the third squad you reinforce with a Warlock and send with your Rangers or Reapers from the Aspect Portal. This build gives you slightly more attack force early on and allows you to inflict more damage on capping units. This build is effective in Eldar mirrors as the third guardian squad with warlock can be used to tie up enemy rangers in melee.

BO3 – Variant 5x Guardian build maximising your Guardian squads. From HQ que a builder then five guardian squads and fleet of foot; the builder already out makes two generators, the second builder helps to construct them. The first three Guardian squads cap the base points, while the final two move out with Warlocks to harass. The aim with this build is to get a good eco with the double generator while holding the map with minimal units to tech quicker. Mysticism and Plasma Grenades are a must here to make the most of your Guardian squads. Don’t be afraid to reinforce your Guardian squads and push in; with enough numbers and Grenades/Mysticism and good micromanagement you can inflict damage.


Micro – Fairly simple when using Guardians, the basic micro techniques apply such as retreating the squad when on low numbers or broken morale, as well as targeting weaker units when shooting such as scouts squads before tactical marines. Remember to turn fleet of foot of when firing or you will receive the 50% reduction in accuracy and turn it on when running for map control; Guardians speed is vital when fighting for relics and critical locations and with fleet of foot they are one of the fastest capping units available. When running into combat with a squad, instead of clicking on the melee/ranged icon, simply press Z to switch stance.

This post has been edited by GW_Fingolfin: Aug 31 2007, 09:22 AM

Posts: 1,541

Game: Dawn of War 2


+
# 4GW_Fingolfin Aug 23 2007, 20:00 PM
Rangers

The Eldar stealth unit used mainly for morale breaking and early harassment in tier one, the Rangers are an excellent unit and is widely used in most Eldar opening strategies. There good morale damage, stealth capabilities and decent infantry damage coupled with Fleet of Foot make them a deadly harassment unit especially for races with weaker detectors. When reinforced to a full squad, Rangers can take down capping units such as Scouts and cultists in a couple of volleys. Builder units take slightly longer and are killed in roughly three volleys (except Chaos heretics). Damage against hardier units such as tactical marines is not great and Rangers are much better at keeping their morale down while other units such as Reapers inflict the damage. In later tiers rangers can be used with your main force for morale draining or alternatively for eco harassment as they do fairly good damage to generators and LP’s with the Optics upgrades from the Soul shrine.

Attached Image


Statistics

Available for construction straight away once the Aspect Portal is complete in most cases the Ranger squad is the first thing an Eldar player will build. A vital part of the Eldar early game only a few strategies do not include this valuable unit. Here is it statistical breakdown:

Build Cost 200/25/2
Build Time 40 seconds
Built From Aspect Portal
Squad Size 5/8
Requires None
Limit One
Reinforce Cost 40/5
Reinforce Time 10 seconds
Hitpoints 280/1
Armour Infantry High
Morale 300/10/150
Unit Mass 10
Move Speed 16
Sight Radius 40 (cannot detect)

Starting at 5 members for the squad you can choose to not reinforce and concentrate on morale damage thus saving extra power, or reinforce to full to do maximum damage to capping units and builders. Only one squad available however the damage that the one squad can do is more than enough and you can even use solely Rangers against some races until T2. Fairly weak armour means you have to use them carefully and try and use as little req as possible reinforcing them; if you have invisibility and keep them safe using FoF you can make them pay off and keep them till later tiers.


Upgrades


Infiltration Attached Image

Your basic stealth upgrade which makes your Rangers invisible permanently except of course to detectors; this upgrade is pretty much vital for your rangers as it makes them so much harder to take down. Even when your enemy have detectors you can still easily avoid detection with careful use of FoF.

The only matchups where it is ok not to get invisibility is Ork and Tau. The Big Mek really does make invisibility useless and the req can be spent on extra Reaper squads. The Tau Commander/Vespid rush means that invisibility at the start is redundant; research it after you have dealt with the Vespids.

Attached Image


Improved/Superior Optics Attached Image Attached Image

Again a vital upgrade for the Rangers, it increases their damage by a decent amount scaling them fairly well into T2 and T3. Here are the actual benefits the upgrades give:

Improved optics = Increases damage to the following values:

Infantry_Med
Infantry_High
Infantry_Heavy_High
Building_Low
Daemon_Med

Superior optics = Increases damage to the following values:

Infantry_Low
Infantry_Med
Infantry_High
Infantry_Heavy_High
Building_Low
Daemon_Med

If also increase Range to 45


Reinforced/Enhanced Armour Attached Image Attached Image

Although the rangers do not receive as much bonus as the other infantry from the armour upgrades they still do benefit so here are the bonuses:

Reinforced Armour = Increases health by 15%
Enhanced Armour = Increases health by a further 15%

This translates to 322 HP per squad member for the first upgrade and 350 HP per squad member for the second upgrade.


Strategies/General Tips

The main use for Rangers in tier 1 is for harassment of capping units and builders and decapping enemy points. With FoF you can quickly get into the enemy base and start decapping points and killing capping units. If builders are close bye then of course shoot them, but make capping units your priority.

Once you are spotted or once they have a sizeable force, pull off slightly and use them to soften up T1 units such as tactical squads or harass outer points such as relics and critical locations. In conjunction with Reapers, your rangers should be able to keep several squads demoralised for a long time while the Reapers inflict heavy casualties.

In later tiers you can keep your rangers with your main force although their use as morale breakers becomes less important as you have more powerful units which inflict heavy damage anyway. As an alternative you can use them to harass enemy generators and Listening posts as with the Shrine upgrades their Building_Low damage is increased. A final use is for keeping your map control; keep your rangers moving between your points so they can take out any potential de-cappers.

When shooting units and builders try and anticipate their path of retreat so you can position your Reapers in a place that maximises their range allowing them to get off the most amounts of shots before moving. See the example below:


Attached Image


On Fata Morga a capping squad will most likely retreat backward into his base for protection. Positioning the Rangers as shown above means that you can get maximum shots off potentially killing the squad; rather than shooting from in front of the point and having to re-position.

This post has been edited by GW_Fingolfin: Aug 31 2007, 09:25 AM

Posts: 1,541

Game: Dawn of War 2


+
# 5GW_Fingolfin Aug 23 2007, 20:01 PM
Howling Banshee

The feared Howling Banshee’s are female Eldar that have chosen a path of combat and destruction; using their Power swords and fast movement to quickly dispatch enemy infantry these squads strike fear into the enemy with their piercing war cry and fluid combat skills. Although weak in tier one and easily avoided with decent micro, banshees can be an excellent addition to any Eldar force and when upgraded correctly they can compete with the toughest of melee squads. Lead by Banshee Exarches equipped with the deadly executioner and masks that emit a piercing cry to demoralise enemy squads, a Banshee squad should always make use of their leader to maximise the squad’s effectiveness. At tier two it is vital to buy the Call of War upgrade while scales your banshees effectively; increasing their damage, health, morale and movement speed; any T2 Banshee squad without this upgrade will be fairly useless and easily shot down by enemy infantry.

Attached Image


Statistics

Fairly weak without upgrades and not very effective in most matchups during tier one, and Eldar player has to really know what there doing when using Banshees; they can either be a god send or a total waste of resources and time. Here is their statistical breakdown from Relic Wiki:

Build Cost 200/0/2
Build Time 28 seconds
Built From Aspect Portal
Squad Size 4/9
Requires Howling Banshee Aspect Stone
Limit None
Reinforce Cost 50/0
Reinforce Time 10 seconds
Hitpoints 385/1
Armour Infantry High
Morale 400/15/50
Unit Mass 10
Move Speed 16
Sight Radius 25 (cannot detect)

Available straight away at tier one after research of the Howling Banshee Aspect stone, an Eldar player can choose to invest in Banshees as their main force or with support from Rangers/Reapers. From their statistics we can see that the squad is fairly expensive at 200 requisition; for the damage they do in tier one many players believe Shees to be costly. A up side to this however is their relatively short reinforce time and cost; you can easily keep a Howling Banshee squad alive if under fire and in a protracted battle they can outlast other slower reinforcing squads (except Kroot).

With 385 points of Infantry High armour, Banshees area fairly weak T1 combat unit and need to be taken care of; they will die easily under any amount of concentrated fire and should be microed carefully. There movement speed is as any other standard infantry in tier one, however with fleet of foot they become very mobile allowing them to easily reach melee and out run fleeing squads. Starting at four members per squad as with most Eldar unit you have to use them carefully until reinforced to large numbers; a four man banshee squad will not accomplish much. In most cases with infantry, reinforcing to full squad count in tier one is seen as wasteful; with banshees it can be acceptable within reason as they need the numbers to be effective. Do not overspend however as you can soon find yourself drained of eco and behind in tech speed.

A final statistic worthy of note is their low unit mass; a mass of only 10 means that they are susceptible to knock back attacks and they will be pushed around easily. Bare this in mind when fighting such races as the Imperial guard who have the Command Squad and Necrons that have the Necron Warriors; both of these units will be hard work for banshees due to their knock back attacks.


Upgrades/Abilities

Exarch Leader Attached Image

As with all Eldar squads, the Howling Banshee Exarch provides a variety of bonuses for the squad at more than one tier. Firstly there is the standard damage increase for the whole squad of 15% as well as the added bonus of an extra squad member. Furthermore with the Call of War upgrade the Exarch gains an executioner blade which dramatically increases its damage as well as double hit points.

War Cry – a special ability the Exarch leader of a banshee squads gains after the Call of war research. They emit a piercing scream that drains morale of squads in the radius. With an area effect of 10 and morale damage of 100 per squad member it hits over 2 seconds, war cry is a really effective ability and it can demoralise whole armies.

Attached Image


When using Banshees always add an Exarch leader as soon as you build the squad; in tier one it boosts the squads effectiveness and this is vital due to their relatively low output otherwise. At tie two the Exarch becomes even more important due to its increased damage and war cry ability; any Banshee squad without one is wasted.


Call of War Attached Image

The research that scales a Banshee squad to the later tiers and the research that makes them deadly; call of war provides a myriad of bonuses for a banshee squad and its leader and boosts their effectiveness to strong levels. Here is what bonuses Call of War give:

- Increase minimum and maximum damage of Banshees by 33%
- Increase hit points of Banshees squad by 66%
- Doubles Banshee morale to 800
- Movement speed increased by 33%
- Exarch Hitpoints are doubled
- Exarch is equipped with an Executioner

Basically the banshee squad is upgraded in every area; HP, morale, speed and damage as well as gaining the war cry ability for the Exarch and a better weapon. This ability is a must when using Banshees as a main part of your force after tier one; the bonus it provide are staggering and scale your banshee squads making them effective and able to kill all infantry and buildings alike.


Improved/Superior Optics Attached Image Attached Image

If you are using Banshees as a main part of your force you should buy them the Call of War upgrade first and then the Optics upgrade. Together they provide substantial damage bonuses for the banshee squads as well as the rest of your army. Here is what they provide for your Banshee squads:

Improved = Increases minimum power sword damage by 15% and maximum by 10%
Superior = Increases minimum power sword damage by a further 15% and maximum by a further 20%

So if you include the Call of War upgrade, and Exarch and both optics upgrades, your tier three banshees will have a cumulative damage bonus of 78% (both maximum and minimum). Tier two Banshees will have a 48% (minimum) and 58% (maximum) increase making them nearly as doubly powerful as in tier one.


Reinforced/Enhanced Armour Attached Image Attached Image

Again an important upgrade for your banshee squads as well as all other Eldar infantry that you are using; the armour upgrades further increase your banshees health (this is sorely needed due to their low starting health). Here is what bonus they give to a Banshee squad:

Reinforce = Increases health of Banshees by 15% and Exarch by 30%. Increases unit mass of banshees by 10.

Enhanced = Increases health of banshees by a further 30% and Exarch by a further 20%. Increases unit mass of banshees by a further 10. Changes banshee armour class to Infantry heavy medium.

These bonuses are more significant than the other bonuses for such units as Reapers and Rangers and hey really boost the banshees together with the call of war upgrade. With both upgrades and Call of war the banshee receives the following: 111% increase in health, 20 increase in body mass and a step up in armour class. This makes them so much more durable and coupled with their speed they become a powerful unit.


Strategies/General Tips

An important thing to remember about banshees throughout the game is that they should never be used as a stand alone force without support from some type of ranged unit. With adequate dancing from the enemy a banshee squad can be rendered fairly useless and do little damage. It is important then to give ranged support so while dancing; the fleeing units are taking losses. A good combination is double reaper with either one or two banshee squads; two banshee squads as well as two reapers can be very costly and set you back a long way when teching. Alternatively you can use Ranger/Banshee/Banshee; a decent combination good for holding map control and harassing capping units.

When using banshees after tier one make sure you optimise their speed and mobility to strike from multiple angles or back routes behind enemy forces. When using the war cry do not use more than one Exarches cry in one phase; it is wasteful and if you use the single cry carefully you will demoralise the squads enough to save the other shouts. Alternatively you can load two squads fully upgraded into a transport if facing mass ranged infantry with such weapons as heavy bolters. Unloading them and causing as much damage and disruption as possible while your ranged squads move in and finish off the weakened squads. If they retreat then simply jump back into the Falcon and move forward.

Attached Image


Micro – when using Banshees remember to take fleet of foot off when in stationary combat; it will reduce their accuracy by 50% and render them fairly ineffective. Use your banshees to tie up as many squads as possible; you should tie a squad up with each banshee squad you have and never should there be two squads chasing the same unit (unless your enemy has only one squad).

When dealing with Commanders try and keep your banshees away as their commander damage is fairly weak compared to the damage they do to other armour classes. Use other units such as Warp Spiders/Rangers to take on commanders or alternatively if you have no other option then use Rangers to break them first so they do not do as much damage in return. If in sufficient numbers your Banshee squads will survive however it is best to try and avoid heroes at all costs. Banshee squads with an Exarch and call of war upgrade will do better as the Exarch has roughly three times the commander damage (with the Executioner) than standard banshee members.

Banshees can be a deadly unit and against races that rely heavily on infantry they can work wonders. However they do require a good investment and if you are only using one squad for support it is advisable to get the optics and armour upgrades for the rest of your army first and leave the Call of War upgrade till last. If you do decided to invest in them, make sure you are fully aware of how to boost their effectiveness and give them support.

This post has been edited by GW_Fingolfin: Aug 31 2007, 09:30 AM

Posts: 1,541

Game: Dawn of War 2


+
# 6GW_Fingolfin Aug 23 2007, 20:02 PM
Dark Reapers

The main anti infantry unit for Eldar in tier one; the Dark Reaper combines long range firepower, adequate damage and excellent mobility to create a hard hitting infantry unit capable of taking down squads with ease. Preferring to rain down destruction on there enemies from long range, warriors who have chosen the path of the Reaper use their deadly Reaper Cannons to devastating effect. Scaling well with optics upgrades from the Soul shrine, Reapers can maintain there effectiveness right through the tiers and stay as a hard hitting support unit when used with Warp Spiders and Platforms. Utilise there Fleet of Foot and Long range to take down shorted ranged but more powerful squads such as tactical squads with plasma.

Attached Image


Statistics

Available straight away after construction of the Aspect portal and then the Reaper aspect stone, most players opt for Reaper starts build 1 or two squads after their rangers. This depends mainly on the enemy you are fighting as against some races like IG an Eldar may build 2x Reaper squads first. Here is the Dark Reapers Statistical breakdown from Relic Wiki:

Build Cost 210/0/2
Build Time 24 seconds
Built From Aspect Portal
Squad Size 3/5
Requires Dark Reaper Aspect Stone
Limit None
Reinforce Cost 70/0
Reinforce Time 9 seconds
Hitpoints 450/1
Armour Infantry heavy High
Morale 300/10/150
Unit Mass 16
Move Speed 16
Sight Radius 25 (cannot detect)

From the statistical break down there are several important things to consider about a reaper squad. The first is there cost. Although taking no power (allowing for no gen mass builds), a Reaper squad costs 210 requisition, which is a heavy price for a relatively low number squad. Make sure if you are using Reapers you use them in there best way to repay the cost.

Secondly there squad number is only 5 (6 with an Exarch) for a T1 ranged squad this is minimal; any loss to the squad is costly and roughly a 20% reduction in the whole squads effectiveness. Make sure you keep as many reapers alive at all times as rebuilding them (70 req a time) can set you back a long way.

With a more Hitpoints per squad member than most T1 units such as tactical squads and Shoota squads the Rangers do have a benefit individually. However the lesser squad number really makes the difference: A 5 man Reaper squad will have 2050 HP whereas a full Tactical squad will have 3120, so really the increased HP does not make much difference.


Upgrades/Abilities

Exarch Leader Attached Image

You should really build the Reaper Exarch ASAP or immediately on the squad construction. Having a 4 man reaper squad with Exarch is much better than having just a 5 man reaper squad without. With a cost of 80/30 you need to watch this however and depending on the number of Reaper squads you have kitting all squads with an Exarch could slow down your tech speed.

The Bonus the Exarch provides is a 15% damage increase to all squad members; this makes them much more effective as sometimes they can lack damage and just seem to tickle enemy squads. Remember that an Exarch scales also with the Optics upgrades and there damage with both Optics upgrades increases by a cumulative total of 50%.

Attached Image


Improved/Superior Optics Attached Image Attached Image

This particular Eldar infantry upgrade increases Reaper effectiveness by a great deal. It really is as must if you plan on scaling your Reapers and making them useful after T1. Both T2 and T3 Optics upgrades provide significant bonuses to the Reaper squads; there actual break downs are described here:

Improved Optics = Increases weapon damage of Reapers by 50% and Exarch by 25% as well as range by 5.

Superior Optics = Increases weapon damage of Reapers by s further 50% and Exarch by 35% and range by a further 5.

So we have cumulative totals of 100% damage increase for Reapers, 50% for Exarch and 10 range increase; there are little other upgrades in the whole game that boost a squad as much as this.

The T2 upgrades put your rangers on the same range as Firewarriors and with the war gear upgrades you can easily match them toe to toe in a fire fight. (However still use them carefully and try to minimise losses).This also gives them the same range as Heavy Bolters and obliterators, just something to bear in mind when fighting other ranged units.

The T3 upgrades put you on par with T2 firewarriors that have the Advanced Pulse rifle upgrade and outrange Flash Gitz. However they have lesser range than both Firewarriors with the optics upgrade and gives you the same range as a standard Kasirkin with hell gun.


Reinforced/Enhanced Armour Attached Image Attached Image

A second important upgrade for your Reapers; this is especially useful due to their lack of squad numbers and fairly fragile build. This is what the upgrades provide:

Reinforced = Increases Reaper HP by 15% and Exarch by 25%
Enhanced =Increases Reaper HP by a further 15% and Exarch by a further 35%

This boosts your reapers to 518 and Exarch to 806 with the T2 upgrade and 597 and 1008 with the T3 upgrade. Coupled with the optics upgrades your Reaper become a solid T2 ranged unit and an adequate supporting unit in T3.


Strategies/General Tips

BO1 – Double reaper straight from the aspect portal can be a good hard hitting strat. Useful against IG to combat an early command squad or Chaos against Raptors. You can build a generator allowing you to get Exarch for both squads straight away (this will put back the second reaper squad a short while) or get both squads out first and then build a generator after. If you build a generator after you will only have enough power for an Exarch in one squad. Send that first squad in to harass capping units and builders. After this you can add a ranger squad or tech up for tier 2.

BO2 – Rangers/Reaper/Reaper with generator. A fairly standard build which can be used against most races due to its flexibility; get the Rangers out first from your portal and after researching Invisibility you can que the Reaper aspect stone. You won’t be able to get the two squads out right away if you upgrade your rangers. Send the rangers in to harass capping units and then follow up with the Reapers to attack builders and inflict damage on your enemies T1 units (which should be broken by the rangers).

BO3 – Triple Reaper (Team games). A very hard hitting tactic; you start with two builders who create an aspect portal and two guardians to cap. Once the portal is built que your reaper stone and then your ally donates you 100 requisition. This allows you to build 3 Reaper squads straight away with an Exarch in one. Send your three squads together and reinforce; combined with your ally’s force of a commander and another T1 squad this is a very hard strategy to counter.

Race Specifics – Ork. For this Reaper are vital unless you are taking the more risky route of Banshees. A strategy that can be used (which can be considered as spam) is 4x Reapers in t1. Use your squads to harass the sluga squads and keep the Big Mek and his entourage from doing too much damage. You use BO1 and just add more Reaper squads. With the T2 upgrades t4x Reaper squads can take down Ork banners really quickly and their longer ranges allows them to soften up Nobs/Slugas.

Some general facts about Reapers; with the tier two optics upgrade they can outrange Listening posts and turrets and 2x Reaper squads with Exarch will do quite a deal of damage to the above. Furthermore there damage against Infantry heavy high units such as terminators is fairly low; they are better used against T1/T3 infantry and in t3 as a supporting squad with Warp Spiders. Transport wise two reaper squads can fit into a Falcon; this can be a good tactic to use when under fire from heavy anti infantry troops. Quickly loading into a falcon for a quick jump. Alternatively you can use this for a quick and heavy attack next to some vulnerable infantry.

Micro – When using reapers you have to utilise both there mobility and range. Instead of clicking to attack a squad with your Reapers (which sometimes causes them to move closer than there longest range) it is better to judge the range and simply stop them by using Q (hotkey for stop). You reaper will then target the closest squad without moving. Always remember to turn Fleet of foot off (Hotkey F) or your Reapers accuracy will be reduced by 50%. If you have more than one reaper squad to quickly turn off Fleet of Foot of all the squads Just press F then Tab (Tab switches to the next squad selected in your group) and repeat until all your squads are free of FoF.

Always use the overlapping technique when chasing squads with Reapers. In theory this should allow your Reapers to continually fire at a retreating squad. Basically if you have two squads fighting a retreating enemy squad you do the following: one squad stays stationary and fires until out of range while you move the other squad forward. On stopping the second squad who commences firing until out of range you move the first squad forward. And so on; sounds confusing but basically you’re continually keeping one Reaper squad in range allowing them to do damage.

This post has been edited by GW_Fingolfin: Aug 31 2007, 09:33 AM

Posts: 1,541

Game: Dawn of War 2


+
# 7GW_Fingolfin Aug 23 2007, 20:04 PM
Fire Dragons

The Eldar’s main form of Anti vehicle and Anti building, the Fire Dragon is a versatile unit with many good qualities and advantages that Eldar players must take advantage of. Firstly Fleet of Foot gives a Fire Dragon squad an edge over any other anti vehicle unit (with possibly the sentinel as the exception), allowing them to quickly engage moving vehicles and chase down fleeing damaged ones. Secondly there high body mass means that it is virtually impossible to knock them down allowing a Fire Dragon squad to easily take down enemy Artillery and bypass mines. Finally with the Optics and armour upgrades from the Soul Shrine a Fire Dragon squad becomes extremely durable and can take a good amount of punishment while taking down buildings etc. When used correctly a couple of Fire Dragon squads can change the tide of a game.

Attached Image


Statistics

Available after construction of the Soul Shrine and purchase of the Fire Dragon Aspect Stone add on (50 req), the Fire Dragon is a main part of any Eldar T2 army. Here is a breakdown of their stats taken from Relic Wiki:

Build Cost 165/30/2
Build Time 21 seconds
Built From Aspect Portal
Squad Size 3/5
Requires Fire Dragon Aspect Stone
Limit None
Reinforce Cost 55/10
Reinforce Time 11 seconds
Hitpoints 500/1
Armour Infantry heavy High
Morale 800/10/150
Unit Mass 90
Move Speed 16
Sight Radius 25 (cannot detect)

The first thing to note is their cost; 165/30 for a T2 anti infantry av is a bargain and you should buy a squad or two in most cases even if your enemy has no vehicles, as they provide excellent eco harassment and base bashing. Good all around stats; solid armour class, decent hit points, excellent unit mass and cheap cost the Fire Dragon really is a unit with which you can easily make back your initial investment. When using them for base bashing take out lower armour targets first such as generators and listening posts as their Building Low damage is excellent and they will level these structures in no time. Against vehicles they will destroy low armour tanks such as Sentinels in a matter of seconds and you should never really need more than one squad (unless against Necron Destroyers or heavy armour tanks) to take down enemy armour.


Upgrades


Exarch Leader Attached Image

Available as soon as you build a Fire Dragon squad; an Exarch should always be added to a Dragon squad without fail as they increase the squad damage by 15% and of course it adds and extra squad member making them more durable and deadly.

When a squad comes out of the Aspect portal que you’re Exarch straight away and then auto reinforce after. Also note that the Exarch benefit from the Armour upgrades available at the soul shrine. The first increases their health to 805 and the second to 1008. The optics upgrades do not however benefit the Exarch, just the regular squad members.

Attached Image


Improved/Superior Optics Attached Image Attached Image

These are a must for Eldar infantry in general; available at T2 and T3 respectively they give the following benefits to Fire Dragon squads:

Improved = Increase Fire Dragon damage by 25%
Superior = Increase Fire Dragon damage by a further 25%

These upgrades make your Dragons even more deadly and with an Exarch you are receiving a cumulative bonus of 65%


Reinforced/Enhanced Armour Attached Image Attached Image

Again making your Fire Dragons much more durable. Depending on your force composition you should get the armour upgrade first. If you have more numbers then get the Optics first, if you have less numbers then the armour first. (Sum up weather you need more armour or firepower in the current situation). The benefits for Fire Dragons are as follows:

Reinforced = Increases health of Dragon and Exarch by 25%
Enhanced = Increases health of Dragon and Exarch by a further 25%

This translates to 597 for the first upgrade and 783 for the second.


Strategies/General Tips

Typically as you Hit T2 depending on your situation an Eldar player should make 1 or two squads of Fire Dragons to immediately start harassing the enemy base and economy. Go for Listening posts and generators first and remember to decap Strategic points once the LP’s are destroyed. Try and keep mobile and not bogged down in one spot; a Fire Dragons strength comes from its mobility so attack from multiple points and keep moving around making defence harder for your enemy.

Transports are a good way to keep your Dragons that little bit safer (note now that only one Dragon squad can fit in a Falcon). A good tactic is to keep one Fire Dragon squad in a falcon and utilise the falcons jump and the Dragons mobility to quickly harass the enemies listening posts and vulnerable positions. Furthermore upgrading the Falcon with a star cannon can provide your Dragons protection from infantry defence.

If under fire from ranged units with no immediate support from anti infantry units it is advisable to engage the ranged squads in combat; Fire Dragons do more combat damage than ranged to infantry and their relatively strong armour means that they will be able to survive until your anti infantry can help out. Against combat units just use Fleet of Foot to run away.

Webway gates can be really useful for surprise attacks using fire dragons. Not such a good idea in 1on1 matches as you probably won’t have the time. However in team games you can place webways at strategic points on the map allowing for Fire Dragons to quickly jump out and make surprise assaults on enemy flanks or at the back of enemy bases.

The most important thing to consider when using Fire Dragons is; where are they needed: Do I need a squad with my main army to defend from vehicles? Are my Reapers in enough numbers to deal with vehicles without Dragons? Where is my enemy weak? Where can I strike to cause the most damage? Don’t simply send your Fire Dragons into an enemy base without forethought unless it is completely empty. Be selective in your targeting and use the Dragons in the way that will impede your enemy the most.

Fire Dragon Micro is fairly straight forward. The basics are turing fleet of foot off when shooting and on when running. Leaving it on when shooting reduces your Dragons accuracy by 50% which is a severe penalty when you want to destroy buildings ASAP. Furthermore, at times your Dragons will go in combat when you are up close to a building; simply pull them out and switch the stance from ranged to combat and back to ranged and it should sort the problem.

This post has been edited by GW_Fingolfin: Aug 31 2007, 09:35 AM

Posts: 1,541

Game: Dawn of War 2


+
# 8GW_Fingolfin Aug 23 2007, 20:06 PM
Warp Spider

Imitating the guardian spiders of Eldar Craftworlds, Warp Spiders are fearsome opponents that use Webway technology to teleport in and out of the Warp allowing for lightening fast strikes on unsuspecting opponents. Able to dish out great anti infantry damage, Spider squads are potent T2 units and with the soul shrine upgrades they become extremely durable and their damage output is greatly increased. Finally they can have haywire grenades allowing them to take down buildings and vehicles in no time whatsoever. At T2 an Eldar player should opt for Warp Spiders after they have some kind of eco harassment force (either fire dragon/Vypers or Wraithlords) as they can deal with most T2 infantry when used properly. Be wary of mass close combat armies as Warp Spiders more fairly slow and if you use all their teleports then you will be stuck in combat. Supported by Reapers and Rangers or the Seer council, Warp Spiders become an excellent anti infantry squad.

Attached Image


Statistics

Available at tier two from the aspect portal after construction of the support portal, Warp Spiders are a valuable squad in the Eldar arsenal and with three available they will form the majority of most elders T2 force. Here are there statistics taken from Relic Wiki:

Build Cost 240/60/2
Build Time 32 seconds
Built From Aspect portal
Squad Size 4/8
Requires Warp Spider Aspect Stone (Requires Support portal)
Limit 3
Hitpoints 615/1
Armour Infantry Heavy Medium
Morale 600/10/150
Unit Mass 15
Move Speed 16
Sight Radius 25 (cannot detect)
Reinforce Cost 60/15
Reinforce Time 12 seconds

From their statistics we can see that there cost is decent; comparing to a Raptor squad in requisition. For three squads you spending 720 requisition and 180 power, which is decent to say you are getting three squads of hard hitting infantry that can teleport. There standard move speed Is 16 putting them on par with most other standard infantry; this can be a problem however as dedicated cc troops are often faster allowing your Spiders to be easily tied up. With 615 HP of Heavy_Medium armour Spiders can stand up to quite a deal of damage and with the upgrades they become very durable.

With a reinforce time of 12 seconds and for 60/12 Warp Spiders can be a drain on an Eldar economy however if you have a good income, due to their decent reinforce time you can maintain three squads even under heavy fire. Starting as a 4 man squad the Warp Spiders can be fragile until reinforced and it is advisable to que an Exarch first and then auto reinforce after. At full strength with an Exarch you have a very strong squad capable of dealing good damage and withstanding a good deal back.

When teleporting you have to consider several things. Firstly is it necessary to teleport at this point in time? Sometimes players will teleport into a battle against combat troops; this is generally a bad idea for two reasons. The first is that you have wasted one teleport giving you one less to escape combat with. Secondly the combat troops will immediately go for your Warp Spiders forcing you in most cases to teleport straight out again. Next we have to consider teleporting away from combat; do I have to, to save the squad? Or can I simply micro the squad being chased while shooting with the other free squads? Finally take into account obstacles; teleporting over buildings in tight situations is a great way to slow down chasing troops as they will have to run around the buildings.


Abilities/Upgrades

Warp Spider Exarch Attached Image

As with all Eldar squads the Exarch leader of the Warp Spider is very important and should be the first thing you buy for a spider squad as it emerges from the Aspect Portal. Not only does it give a bonus to the squad it also scales with the Optics and Armour upgrades making your squad more potent. When an Exarch is attached it gives the whole squad a 15% damage increase, so buying this unit is vital for your Spiders. Furthermore when you purchase the Haywire grenades in tier three, the Exarch gains dual death spinners which significantly increase its damage and accuracy.

Attached Image


With the Armour upgrade from the Soul Shrine a Warp Spider Exarch against a 15% health increase at both tier two and tier three; making your Spider squad more durable and with the damage boost and Dual death spinners any Spider squad in tier three without an Exarch is wasted.


Enhanced/Superior Optics Attached Image Attached Image

As for all Eldar troops, the Optics upgrades available at tier two and three are really important for your Warp Spiders; the bonus they give cannot be missed and a Spider squad without them although still packing a punch, will not be as effective. Here are what they provide:

Improved Optics = Increases Warp Spiders damage by 25%
Superior Optics = Increases Warp Spiders damage by a further 40%

So that is a cumulative bonus of 65%, note that the second bonus at tier three is much higher than the first so getting the tier three optics is even more important.


Reinforced/Enhanced Armour Attached Image Attached Image

Again Warp Spiders gain significant bonus from the Armour upgrades available at tier two and tier three and it makes them extremely durable, able to withstand great firepower while dishing out a lot of their own. Here is what they provide:

Reinforced = Increases HP of Warp Spiders and Exarch by 15%. Increase morale of Warp Spiders by 100.
Enhanced = Increases HP of Warp Spiders and Exarch by a further 25% and morale by a further 100.

Again the second upgrade provides a greater bonus and scales your Warp Spiders really well. The total cumulative bonus is a 40% increase in health and 200 increase in morale which boosts the Spiders to 800. This is a great upgrade for your Spiders and combined with the Optics your Spiders can become a really powerful unit.


Haywire Grenades Attached Image

Possibly the best grenade in the game (bar the Kasirkin grenade which is imba) due to its high damage and range, the Haywire Grenade is a must for Warp Spider squads at tier three as it makes up for their relatively poor building and anti vehicle damage.

With a cool down of 120 seconds you should be able to use them several times and when you have three squads of Warp Spiders three haywires can level a building in a few seconds. Great against vehicles too they make short work of light armoured tanks such as Sentinels leaving red health for Reapers or other squads to finish off, while damaging heavier tanks greatly. For 100 requisition and 50 power this devastating item really is a bargain and an essential item for a Warp Spider Squad.


Strategies and General Tips

When using Warp Spiders you have to use their teleports at the optimum time as close combat units will tear them apart. If you consider all the things said in the opening paragraphs regarding teleporting then you should be fine. Also when you have three squads of Warp Spiders it is ill advised to teleport all three squads in at once to a fight; it is much more sensible to teleport one squad in to gauge the situation and then if you think it is beneficial, teleport the other two in; this minimises the chance of all your Spiders being tied up in combat the moment they arrive.

Targeting squads with War Spiders can be risky; sometimes they will walk and shoot to get in ranged and move up close to the squad. This can cause major problems again combat troops and it can be more effective to let the Spiders simply shoot of their own accord (unless of course they start targeting buildings). If you do choose to target manually then make sure you are aware of the Warp Spiders range roughly and of course target weaker squads first. A War Spiders range is 25; which puts it on par with a standard marine bolter and shorter than chaos and marine plasma so be careful when fighting a csm or tactical mass; target one squad at a time.

Attached Image


When using Haywire grenades do not use all three on one target as it is overkill especially on weaker structures and you should have the last one for a different unit or building. Always use haywires against transports too; they can quickly destroy the vehicle leaving the squads inside vulnerable to the Warp Spiders death spinners.

When facing chaos tier three, Warp Spiders are not normally enough to kill the possessed and Obliterators (possibly sorcerer) on their own; the Possessed with flamer will run around, exhausting your teleports and keeping your Spiders broken. The best way to counter this is by first having reaper support and taking down the obliterators first; this unit will do the most damage to your spiders so its handy to have a guardian or banshee squad handy. After this try and keep your Warp Spiders as far apart as possible while keeping in range of the possessed. With a good bit of micro you should be able to take them down.

Remember that two Warp Spider squads can fit inside a Falcon transport. You may ask; well why put a squad that can teleport inside a transport? Basically because we want to save the teleport for as long as possible and only use them if it’s absolutely vital to. Loading your Warp Spiders into a falcon allows them to be mobile and keep their teleports for dyer situations. Furthermore the Spiders can exit a Falcon in the middle of a jump! This is really useful for twin attacks; your Falcon jumps to one place and your Spiders jump out half way to attack a different point. Alternatively, loading two different squads into a Falcon, i.e. a Reaper and Spider squad allows you to make use of their range: The Spider jumps out half way to be close while the reaper stays for the duration and makes use of its longer ranged. Be creative and remember to use falcons against combat races to keep your Spiders that little bit safer.

This post has been edited by GW_Fingolfin: Aug 31 2007, 09:38 AM

Posts: 1,541

Game: Dawn of War 2


+
# 9GW_Fingolfin Aug 23 2007, 20:06 PM
Seer Council

The Seer council is a elite unit formed of skilled Warlocks taken from the Eldar Craftworlds who use their psychic powers in battle to devastate the enemy and protect a Farseer. The most powerful Eldar melee unit (excepting of course the Avatar), a Seer council is a potent unit available at tier three and is a valuable asset to any Eldar army. Especially useful to take on other races powerful combat specialists such as the Chaos possessed and Ork Nob quads (providing you have adequate ranged support i.e. Warp Spiders) or to disrupt and tie up ranged infantry due to their fleet of foot movement, a Seer council can fulfil a wide range of tasks. Furthermore an attached Farseer boosts the squad and in return the Seer council reduce the Farseers recharge time for psychic abilities and provide a solid bodyguard for her fragile health.

Attached Image


Statistics

Available at tier three after the Mobilise for war research from the Soul Shrine and built at the Webway assembly the Seer Council is a unique unit and only one squad can be built. Armed with a Shuriken Pistol and witchblade, each member is a deadly foe in their own right able to dish out damage in combat and use psychic abilities. Here is their statistical breakdown taken from Relic Wiki:

Build Cost 240/150/2
Build Time 42 seconds
Built From Webway Assembly
Unit Size 3/9
Requires Mobilise for War
Limit 1
Hit points 600/2
Armour Commander
Unit Mass 15
Move Speed 16
Sight Radius 30 (Detection 30)
Reinforce Cost 80/50
Reinforce Time 18 seconds

From these statistics we can see that the Seer Council starts off with only three squad members; this makes it extremely vulnerable on first production from the Webway Assembly. If you are building the squad when under attack, make sure you retreat it and reinforce it first before sending it into a fight as its low initial squad number will make it fairly ineffective. Secondly the reinforce time is 18 seconds which is quite a long time for a unit that only starts with three squad members; a Possessed squad reinforces in 10 seconds and a Nob squad in just 9 so again in a longer battle a Seer Council is at a disadvantage.

With 600 HP of commander armour and a possible 9 squad members the Seer council is really durable when reinforced to full cap; other melee units have infantry heavy high armour giving the Seer council a slight advantage. However units like the Grey Knights and possessed squad are morale immune and the Seer Council does have morale putting them at a disadvantage again. A Seer council can also detect; this makes it a valuable tier three unit especially against such races as chaos who could use invisible csm or Tau who could Stealth suit harass or use Devilfish. Possibly one of the hardiest detectors in the game next to the Warboss, an Eldar player should always bear in mind there detecting capabilities.

A Seer Council’s cost is fairly high at 240/150 and you must be certain that it will be worth the investment once brought. Its reinforce cost is fairly high also at 80/50; a fully reinforced Seer Council will have cost you a total of 720 in requisition and 450 in power; this is enough for three Warp Spider squads on there own. A fairly expensive unit when summed up, a Seer Council is however worth it when used right.


Abilities/Upgrades

Recharge Reduction

Using their psychic powers, a Seer council and concentrate their collective minds to enable others to better use their own. A passive ability that makes the Seer Council and any attached heroes ability recharge times reduced by 85%.

This ability is always activated and it stacks with the Farseers Veteran and hero upgrades from the Soul Shrine. Collectively you get 15% reduction from the Seer Council, 10% from the Veteran Upgrade and 10% from the Hero upgrade. This is a total cumulative bonus of 35% - a significant reduction for powers that are much needed.


Embolden Attached Image

Once mysticism is researched from the Webway Assembly the Seer Council gains the Embolden ability. Again the Seer Council combine their powers to give the squad a boost in morale for a period of time.

This ability can be activated at any time and affects the squad only, giving a total boost of 200 morale points per squad member. This is a really useful ability when under concentrated fire and can be used to boost the squad’s effectiveness or regain morale when broken.


Conceal

A passive ability that is permanently activated after mysticism is researched from the Webway assembly; conceal allows a Seer Council to shroud themselves in their psychic powers to reduce the amount of ranged damage they take.

This is a very effective bonus as it reduces the ranged damage by 50%, and once Mysticism is brought, your Seer Council will always receive this bonus. However this ability does not affect an attached Farseer.


Strategies/General Tips

A pretty straight forward unit to use; remember the basics of fleet of foot (turning it on while moving and off again once in combat or your squad will receive a 50% reduction in accuracy) and use their mobility to your advantage (for flanking or surprise attacks). Nearly all of their melee attacks are disruption which can actually be annoying as they will take absolutely ages to kill a simple t1 unit like a tactical squad.

Attached Image


A Farseer attached can do wonders both for the Seer Council and the Farseer itself; if you have either on the field then it is a wise idea if you have the spare requisition to buy the other. They complement each other nicely and when used together they can be quite potent. With reduction in the Farseers abilities and good durability a Seer Council can be a really hard squad to take down.

It is always advisable to buy Mysticism when you have a Seer Council (If you have not already brought it beforehand). The Bonus you receive from this research is excellent for the Seer Council, making it much more durable and able to withstand a great deal more ranged firepower. Use Embolden carefully as it has a 150 second cool down; when your morale is low or when you want a quick boost are opportune times to use it.

When combating other melee specialist units it is advisable to have support; the Seer Council will not simply smash through other squads on its own and you should never send the squad in without some Warp Spiders or Reapers on ranged. This squad is best used for disruption of mass ranged armies and to cause a distraction while your Rangers and Warp Spiders cause the serious damage.

This post has been edited by GW_Fingolfin: Aug 31 2007, 09:40 AM

Posts: 1,541

Game: Dawn of War 2


+
# 10GW_Fingolfin Aug 23 2007, 20:06 PM
Farseer

Farseers are powerful warlocks who show exceptional skill concerning the warp and diving the future. Able to see events far into the future and predict paths to take the Eldar to glory, a Farseer is often seen as a mystical being with ulterior motives. Using there power to use the warp during combat a Farseer can unleash deadly psychic attacks on their opponents and guide her fellow squads allowing them to use their weaponry at increases heights of accuracy. Although fairly weak compared to the other heroes in base combat, the Farseer excels in other areas such as special abilities and disruption. Her mind war unleashes a psychic blast on a single being taking of a good amount of damage while the Psychic storm sends a blast upon a wide radius, damaging squads. Her guide ability heightens the senses of a nearby squad allowing them to do increased damage while the Eldritch Storm creates a powerful energy wave causing damage to vehicles and infantry alike. A very useful hero when used correctly a Farseer is especially useful in certain match-ups such as Tau against the Commander and Orks to disrupt Shooters and combat the Big Mek. When used with a seer council (that lowers her recharge rate of psychic abilities) the Farseer becomes even more deadly.

Attached Image


Statistics

Available at tier one after construction of the Aspect Portal a Farseer can be a very useful hero for both disruption and softening up lighter infantry for your ranged troops to finish off the job. Alternatively when attached to a squad you can keep the Farseer relatively safe and use her abilities. Here are her statistics taken from Relic Wiki:

Build Cost 240/80
Build Time 57 seconds
Built From Aspect Portal
Unit Size 1
Requires Webway Assembly
Limit 1
Hit points 1350/2
Armour Commander
Unit Mass 15
Move Speed 16
Sight Radius 35 (Cannot Detect)
Attachable Yes

From the Farseers bare statistics there are several things to note. Firstly the cost; at 240/80 the Farseer is more expensive power wise than all other T1 heroes (Except Tau Commander with Flamer upgrade and Necron Lord) and second highest in requisition after the Force Commander. As it is a fairly fragile unit the cost can be hard to make back, this means that if you are willing to spend the money on a Farseer that you have to make it pay off and utilize its abilities.

Secondly its build time is one of the lowest of the heroes (the same as a Force commander and less than a Big Mek and Chaos lord). Therefore if you wish to counter an enemy’s hero you can get the Farseer out first and get the first hit. With fleet of foot the Farseer is one of the fastest heroes (on par with the Harlequin and as fast as Jump troops) and Eldar players should bare this in mind for both attacking and fleeing from enemy fire.

The Farseer has 1350 HP of commander armor ranking it low among the other heroes; intact only the Sorcerer, Tau Commander and Harlequin have less health. Bare this in mind when using the Farseer as it cannot stand up to other commanders in a 1on1 battle unless using all its abilities and with support. Furthermore a Farseer will succumb under concentrated fire a lot easier than other heroes so never let it wonder into a whole army on its own.


Abilities/Upgrades

Psychic Storm Attached Image

Unleashing a powerful psychic blast that affects an area this ability is useful against T1 infantry, especially capping squads or weaker units like guardsmen and cultists. With a range of 35, duration of 10 seconds and an area of effect of 10 seconds the Psychic storm is quite useful. The damage it does rangers from 120-170 for the duration (this will weaken such units as guardsmen to a quarter of their health) however it does not affect Buildings or Vehicles.

When activated on a squad it tracks the targeted unit and damages them for the whole duration as well as damaging other squads in the area of effect. Bear in mind that you can also target the ground with this ability making it useful against fast moving squads and invisible units. (Using a psychic storm on stealth suits or invisible cultists is a great deterrent and cheap way to take them out). With a cool down of 155 seconds (over 3 minutes) use this ability carefully as realistically you will only use it once or twice before your Farseer is killed or you hit tier 2.

A final point to note is that the Farseer veteran and hero upgrades decrease the recharge time by a total of 19% which is roughly down to 120 seconds. Although a useful ability in tier one, after this you will have more damaging units and abilities to use so the psychic storm becomes fairly obsolete. It is however always a good idea to use it whenever possible.


Mind War Attached Image

Singling out an enemy and penetrating their mind to deal damage the Farseers mind war is a good ability and when used wisely can finish off weakened heroes. Doing damage ranging from 390 to 440 over the 5 second duration this takes a significant chunk from enemy heroes especially the weaker ones like tau commander and sorcerer.

When using the ability make sure your Farseer is close to the target, as if the targeted enemy moves out of the range of the mind war it stops working and the full damage amount will not be inflicted. Useful tips when using mind war are as follows: It can one hit kill the following units: Skull probe, Heretic, Bonesinger, Earth Caste Builder, Servitor, Scarab, Techpriest and all Imperial Guard heroes except the Priest.

Attached Image


This ability can make the Farseer a viable choice against such races as Tau and Imperial guard who have weaker commanders; the Tau commander will be reduced to roughly half health while the command squad will loose a member straight away greatly reducing its effectiveness.


Guide Attached Image

Using her Psychic powers to heighten the sense and abilities of a nearby squad a Farseer can guide them on the battlefield to do increased damage. This is a really useful ability especially in tier one to combat mass infantry. With a range of 40 you can easily activate it on a squad that is entering a battle and with duration of 25 seconds Guide can boost a ranged squad greatly.

Statistically Guide improves the accuracy of the targeted squad by 30% for duration of 25 seconds. Translated to actual damage per seconds this can boost squads output by 40% making them nearly twice as effective. Bear in mind that these values are base on the original accuracy of the squad. Guide can be used on all infantry types including Commanders and Monster Medium as well as heavy infantry.

Use it well as again the cool down time is 150 seconds so you wont get to use it much in the game. Suitable targets to use it on are Reapers and Rangers that have a good firing position against enemy infantry. Try and avoid using in on squads that are on the move as it will reduce the time you can stop and shoot with them.


Fortune Attached Image

A rarely used upgrade from the Soul Shrine; Fortune provides the Farseer with a aurora that reduces ranged damage infantry squads receive within the Farseers proximity. A passive ability that is always activated once researched and costing only 100/50; it should be considered and is ideal for when you have massed infantry in tight situations.

With an area of effect of 15 emitting from the Farseer it is ideal for when your hero is attached to a squad. The actual bonus it provides is a 10% reduction in ranged to all squads in the area of effect (does not affect close combat damage taken). Although it does not seem like much of a reduction; Fortune is a cheap ability with good effect and when you plan on using your Farseer for a long time it is a good investment.


Eldritch Storm Attached Image

A very powerful ability available in tier two from the Soul Shrine, the Eldritch Storm unleashes a large psychic blast that damages infantry, buildings and vehicles (basically a larger and more potent form of the standard psychic storm) upon impact for duration of 5 seconds. At a cost of 150/50 it is again a good investment for the cost (which will easily be made back on the abilities first use) if you plan on maintaining your Farseer. The setback however is the relatively long research time of 70 seconds which can slow down your unit upgrades; always buy this ability last and make sure you have the Optics and Armour upgrades first. Finally its cool down is 3 minutes so use the ability carefully.

Damage wise it does roughly 100-130 damage to all infantry armour types and 1100 to all buildings types. This makes it particularly effective against generators and listening posts and if your enemy has several gens placed together (a generator farm) then ES can deal significant damage to them. Also useful against massed infantry for both damage and disruption it can make significant dents in an army allowing for your ranged units to pick off the rest while they are knocked down.


Farseer Veteran/Hero upgrades Attached Image Attached Image

These two upgrades available at tier two (Hero is available after veteran is purchased) are really useful to boost the effectiveness of your Farseer and make her more durable and potent. The benefits are described below:

Farseer Veteran Upgrade:

- Increases health by 400 to 1750
- Increases health regeneration by 0.5%
- Decreases ability recharge time by 10%
- Increases melee damage by 15%

Farseer Hero Upgrade:

- Increases health by a further 300 to 2050
- Increases health regeneration by a further 0.5%
- Decreases ability recharge time by a further 10% (19% total)
- Increases melee damage by a further 20% (38% total)

Looking at these bonuses they boost your Farseer by quite a decent amount and you should always buy these when using the Farseer for a prolonged period of time. Again make sure that buying these upgrades does not conflict with your Infantry upgrades such as Optics and Armour as they are more important.


Strategies/General Tips

The most important thing to remember when using the Farseer is that it is NOT a tanking hero like the other races. It cannot simply walk into a T1 army and cause a deal of damage; it will be shot down fairly easily due to its weaker health. The main role of a Farseer is for its abilities and for disruption; its abilities will greatly help you in tier one and its disruption allowing your ranged troops to freely shoot your enemy troops with little resistance. It is more of a supporting hero to complement the rest of your force.

Attached Image


Race Specifics – Ork. A Farseer with a couple of Reaper squads can be really useful against Orks. It can help take down the Big Mek and disrupt annoying units such as Shoota squads and slugas. Keep it away from Waagh banners however as it will be killed easily and always give it support. Use guide on your Reapers/Rangers and make use of her mobility and disruption attacks in melee.

Race Specifics – Tau. Again a Farseer can be extremely useful against Tau to mainly combat the Tau commander; due to its weak health you can use mind war which will take the Commander down to roughly 560 (if mind war works fully). Using fleet of foot you can track the Commander and keep it from doing a great deal of damage, be wary however of snare traps as these will be the bane of your Farseer.

Race Specifics – IG. Although not as vital as against Orks and Tau, a Farseer can come in handy if you are having trouble with the Command Squad. Mind war will kill a command squad member (except a priest) in one hit; reducing the squads effectiveness as a whole dramatically. With some careful micro and concentrated fire, the rest of the command squad will fall in no time allowing your Farseer to disrupt the Guardsmen.

This post has been edited by GW_Fingolfin: Aug 31 2007, 09:42 AM

Posts: 1,541

Game: Dawn of War 2


+
# 11GW_Fingolfin Aug 23 2007, 20:07 PM
Harlequins

The secondary Eldar hero unit; the Harlequin is dedicated to the Eldar laughing god Cegorach and excels in close combat and lightening strikes. With really fast movement speed and good command damage they can make excellent hunting squads against enemy heroes. However there real usefulness comes through their ability to disrupt mass infantry and deal significant damage with their special attacks. The Harlequins kiss deals great damage to most infantry squads in a wide radius if activated properly, while the dance of death provides mass disruption against enemy squads. If used properly and carefully a harlequin can be a deadly unit especially against races with weaker armour infantry such as the Imperial guard.

Attached Image


Statistics

Available immediately at tier two from the webway assembly a Harlequin is a valuable unit in certain match-ups and at least one should be brought to support your T1 force or for detection. Although a weak hero on its own, when used with other forces or in a group of 3 Harlequins, they can be really useful and turn the tide of a game in certain match-ups. Here are there statistical break down from Relic Wiki:

Build Cost 125/125/1
Build Time 30 seconds
Built From Webway Assembly
Unit Size 1
Requires Soul Shrine
Limit 3
Hit points 625/1
Armour Commander
Unit Mass 10
Move Speed 24
Sight Radius 35 (Detection 35)
Attachable No

From this breakdown we can see several things: firstly it has a good sight radius which compares to the range of a Heavy Bolter space marine. Also note that it can see as far as it can detect, whereas some other units sight is longer than their detection range. With the best detection ranged of all the detector units (equal with the Necron scarab) a Harlequin really is a good detector unit due to its mobility, range and commander armour.

Secondly we can note a Harlequins cost; for 125/125 this is roughly half of all other commander costs in requisition (except the sorcerer) but a significant amount more in power. For the abilities and potential damage it can dish out however it is a minimal cost and can easily be made back with careful use. Health wise it compares poorly to other hero units with only 625 HP in commander armour; all other hero units outstrip it by at least 300 HP. This can be understandable however as you can have 3 Harlequins, giving a total of 1875.

A final point of its statistics to note is its movement speed; at 24 a harlequin can move faster than all t1 infantry and as fast as jump troops such as Assault Marines and Raptor squads. Although a Harlequin has no fleet of foot, there increased base movement speed does make up for this and it still can travel quickly.


Upgrades/Abilities

Dance of Death Attached Image

With lightening speed a harlequin using the Dance of Death will quickly jump from enemy to enemy knocking them down while dealing roughly 75 damage to each target it hits. With a 20 second time frame and a range of 5, this ability can disrupt several enemy squads rendering them fairly useless at ranged allowing for other such units as reapers and warp spiders to shoot the instable squads.

Try and save this ability when you have several enemy squads to disrupt; although useful when used against a single squad, it is much better server for 2+ squads in close proximity. Excellent for stationary squads, it can be even better for disrupting fleeing/retreating squads to hamper there escape.


Harlequin’s Kiss Attached Image

Projecting a micro filament from there mouth, the Harlequins kiss pierces enemy units causing great damage and the resulting effect can damage surrounding squads in a shower of blood. With only a short ranged of 5 the Kiss needs to be used carefully and at the optimum time. Dealing 4000 damage to the targeted unit and 200 to any surrounding units it hits, the Kiss does considerable damage to all units with the following armour classes: Infantry, Infantry Heavy and Monster Medium. Note that Krootox are monster medium allowing you to take off potentially 2/3 of its health leaving it on 2500 of its original 6000.

Attached Image


When using the Kiss it is best to use it on stationary squads as if activated on a targeted squad it can be buggy and cause less damage or take a prolonged period to activate. It is preferable to use Dance of Death first to knock down a large group of infantry and then perform the Harlequin’s kiss after DoD has finished.

This ability is particularly effective against low armour squads such as Imperial guardsmen, Guardian squads and cultists. Guardsmen squads have only 160 basic health, with a Sergeant they get boosted to 215 per squad member. So with a guardian or reaper squad stood by even an upgraded Guardsmen mass of 3 squads will fall pretty much immediately to a Harlequin Kiss. Most T1 capping squads will be killed outright while other infantry such as tactical squads will be reduced to around half their health. (Note. The ability has to work to full effect).


Farseer Veteran/Hero upgrade Attached Image Attached Image

This is a rarely used upgrade that boosts both the Farseer and harlequin in someway. Both available at tier 2 from the soul shrine they boost the harlequins health. Here is what it provides:

Farseer upgrade = increases Harlequin health by 15%
Hero upgrade = increases Harlequin health by a further 15%

So this translates to 775 for the first upgrade and 925 for the second. Not a great improvement but still if you have the spare req and your soul shrine is free then there is no reason to not get this upgrade.


Strategies/General Tips

Firstly you have to consider which Ability to use first; choosing the wrong ability can be a terrible waste of a harlequin and the 60 second recharge of both abilities might not be long enough for the hero to survive. When fighting mass ranged units who are targeting the Harlequin it is best to use Dance of death to disrupt them and minimize the damage the Harlequin takes. Once the is finished you can then use the Kiss or a second Harlequin can perform the kiss while the first if using DoD. Against mêlée units it is wise to use the kiss first and then dance of death to finish off the weakened squad. When facing such units as Bezerkers you will need a couple of Harlequins as one will simply get surrounded and its abilities might not activate.

Using Harlequins in a Falcon is a good way to optimize their abilities; loading two into a falcon and quickly dropping them out on a mass of infantry then activating their abilities can be a great way to use them. After the abilities are used you can pop them back into the transport and wait for the abilities to recharge.

Attached Image


Never send your Harlequins into a fight without support; they are not strong enough to simply take on a whole army without help, there weak armour will mean they get shot down before doing much good at all. You best way is to send in your main infantry force first as a distraction and set up a firebase. While this is happening send your Harlequins in from a different route and quickly run into the midst of the battle. Your enemy has then two choices; the first is to concentrate fire on the Harlequins, this will leave your ranged troops unharmed and able to do a good amount of damage. Alternatively they can ignore the Harlequins and keep shooting the ranged troops; this way your Harlequins will be able to maximize their abilities.

One thing to remember when using your abilities is that the Harlequins kiss affects friendly units too! Many times I have seen people use this ability near their own guardians, only to loose several squads in the area of affect!

Using a trio of Harlequins to fight enemy commanders can be very effective. Although three harlequins cost more than all other heroes they will take other commander units out and survive fairly well, just make sure you keep them safe after as they will be vulnerable. Finally you can use Harlequin’s Kiss on a Krootox! Having several harlequins against Tau can work wonders for taking down these tough units. Excellent against the stationary heavy weapon team also a couple of Harlequins can quickly dispatch these troublesome units.

In certain matchups (like Eldar mirror) and especially in teamgames an Eldar player can do a quick tech for harlequins. The build order is as follows:

- HQ: Bonesinger, Guardian, Guardian, Guardian (3rd is optional)
- 1st Bonesinger: que's 2x generators
- 2nd Bonesinger: helps build the two generators
- Guardians: cap base points
- Once generators are built: Both Bonesingers build Soul Shrine
- When soul shrine is building you can get another Bonesinger who can start LP construction.

(You can build roughly 2 LP and upgrade one during the time it takes to build the SS)

- at about 2.30 you have your SS and can build a Harlequin straight away


This tactic can be risky but if you get a solid eco you can get falcons shortly after.

This post has been edited by GW_Fingolfin: Aug 31 2007, 09:44 AM

Posts: 1,541

Game: Dawn of War 2


+
# 12GW_Fingolfin Aug 23 2007, 20:10 PM
Avatar of Khaine

The Eldar super unit; the Avatar of Khaine is the physical representation of the Eldar god of war: Kaela Mensha Khaine. In times of dyer need the Eldar Farseers will call upon Khaine to aid them in battle. With high health and great damage to other Super units, the Avatar is one of the strongest T4 units and is excellent for base killing and soaking up large amounts of damage allowing for other Eldar units to shoot at will. A further benefit is the passive bonus it gives to its surrounding units as well as increasing the squad and vehicle population cap.

Attached Image


Statistics

As a Super unit only available with a captured relic the Avatar has some pretty good statistics; boasting high health, morale immunity, invulnerable to all knockdown effects and most special abilities due to its monster high armour the Avatar is both versatile and hardy. Here is it statistics taken from Relic Wiki:

Build Cost 400/400/5
Build Time 90 seconds
Built From Aspect Portal
Squad Size 1
Requires Webway Assembly, Support Portal, Annihilate the Enemy and Relic
Limit 1
Hitpoints 15000/1
Armour Monster High
Morale Immune
Unit Mass 100
Move Speed 20
Sight Radius 25 (cannot detect)

With 15000 HP the Avatar outstrips all other super units by at least 4000 and has the most HP for a unit in the game. With its Monster High armour this makes it extremely durable and it can be really hard to take down without the right units. With 70% accuracy on its Wailing Doom weapon the Avatar averages roughly in the middle of the super units, bettering the Squiggoth but being not as accurate as the Bloodthirster or Knarlac who have 95% and 100% respectively. Although the Avatar has a high cost (greater than all races Tier 3 cost, but the same as all other races super unit) it is a worthwhile buy due to its benefits.


Abilities

Inspiring

This passive ability is activated the moment your Avatar is built. (Note. The way to notice if an Avatar is near is by looking at enemy troops for a slight orange glow around the units). With a range of 30 it is advisable to keep troops close to the Avatar so they can benefit as much as possible. Here is what “Inspiring” provides to nearby units:

- Friendly units within the area of effect of the Avatar do not take any morale damage
- Total Squad cap and total Vehicle cap are increased to 24 and 30 respectively
- Units produced at the Webway Assembly and Aspect Portal have their Build Times halved

So, with an Avatar your army becomes morale immune which is a significant boost especially in prolonged battles and can be detrimental in full scale T4 battles. Secondly you can build more infantry and vehicles although you need to create webways to get this benefit. And finally build times are halved.

Some players simply keep the Avatar in their base for defence and to keep the Build time and increased population cap bonuses. Although with its high health you can keep the Avatar in the middle of a battle provided you have a decent enough force to support it.

Attached Image


Strategies/General Tips

Firstly here is an analysis of the Avatar in Single Combat battles against other super units. (Note. I have tested all of these fights and they are based on face values with no other units contributing or no abilities activated unless stated):

Avatar vs. Bloodthirster
- Avatar wins with roughly 4000 health left

Avatar vs. Squiggoth
- Squiggoth wins with roughly 500 health left (Evenly matched)

Avatar vs. Daemon prince
-Avatar wins with roughly 13000 health left

Avatar vs. Daemon prince with Daemonic Strength
-Avatar wins with roughly 12000 health left

Avatar vs. Knarlac
- Avatar wins with roughly 200 health left (Evenly matched)

Avatar vs. Knarlac with Improved metallurgy
-Knarlac wins with roughly 3000 health left

So the Avatar dominates the Chaos super units and is roughly even with the others except the Knarlac with its upgrade. If you see another super unit, it is pretty safe to use your Avatar against it providing you use supporting fire just to make sure of the outcome.

There is not much more to say about the Avatar other than use it wisely and don’t simply throw it headlong into a battle without support; it is a super unit, however it will get smashed if you use it poorly. Always keep in mind its abilities and the bonus you are receiving. If you have the chance then send the Avatar into the enemy base as its building damage is fairly good and it will inflict a good amount of havoc.

This post has been edited by GW_Fingolfin: Aug 31 2007, 09:45 AM

Posts: 1,541

Game: Dawn of War 2


+
# 13GW_Fingolfin Aug 23 2007, 20:11 PM
Replays

Attached File Fingolfin_vs_Sniper__Eldar_vs_IG_on_SoE_.rec
Size: 273.52k
Number of downloads: 353
Player Name Side Team
Fingolfin|T 1
SnIp3R|T 2

- Eldar vs Imperial Guard on Shrine of Excellion showing good use of Farseer abilities and Fire Dragons in Falcons.

Attached File Fingolfin_vs_D_hara__Eldar_vs_SM_on_BR_.rec
Size: 266.25k
Number of downloads: 327
Player Name Side Team
D-Hara 1
Fingolfin|T 2

- Eldar vs Space marine on Blood River showing Use of a triple Fire Dragon force to counter harass and destroy the Marine economy.

Attached File Fingolfin_vs_Vaultdweler__Eldar_vs_Eldar_on_BR_.rec
Size: 337.21k
Number of downloads: 190
Player Name Side Team
Rubber_Donkey 1
Fingolfin|T 2

- Eldar vs Eldar on Blood River showing solid play on both sides including use of Bonesingers to tie up Fire Dragons and back door Ranger Harass.

Attached File Fingolfin_vs_Brentino__Eldar_vs_Ork_on_SoE_.rec
Size: 298.75k
Number of downloads: 198
Player Name Side Team
Fingolfin|T 1
brentino 2

-Eldar vs Ork on Shrine of Excellion showing a mass Reaper build supported by Warp Spiders and counter harass with Wraithlords.

Attached File Fingolfin_vs_Ushenge__Eldar_vs_Chaos_on_BR_.rec
Size: 273k
Number of downloads: 243
Player Name Side Team
Fingolfin|T 2
[DGG]Ushenge 1

-Eldar vs Chaos on Blood River showing Use of Rangers and Reapers to harass and defend from bezerkers.

Attached File D_Archon_vs_NaD__Eldar_vs_Ork_on_BR_.rec
Size: 269.49k
Number of downloads: 245
Player Name Side Team
D'Archon 1
NaD 2

-Eldar vs Ork on Blood River showing a Harlequin quick tech and good use of Halrequins supported by Reapers to take down an Ork mass.

This post has been edited by GW_Fingolfin: Aug 31 2007, 09:46 AM

Posts: 1,541

Game: Dawn of War 2


+

1 User(s) are reading this topic (1 Guests and 0 Anonymous Users)