The Third Tiberium War has passed and the world is in rubble. Cities have been annihilated, Redeemers have torn all GDI settlements to shreds and Motherships were not fond of any but the reddest zones. Now, it is up to you to rebuild!
Proper introductions
Hello, fellow worldbuilders!
My name is Zypherbullet, but you can call me anything you like! I have always had an interest for world building and I would like to share my knowledge with you. There are quite a few tutorials floating around the interwebs to get you started, but I found that whenever I wanted to learn something difficult, there was nearly no documentation. Over the past months, I have been going through the Worldbuilder and searching the Internet to find out as much as I can. No campaign map went undissected and now I possess great knowledge of the subject.
Let's start off with my very first tutorial! I base my tutorial on a set of frequently asked questions and combine them into a scenario. Today's tutorial will be about making a tournament map. We will be taking a look at textures and texture blends, the properties of a Tiberium field, making a map symmetrical in any direction and implementing some basic scripts.
Before we jump into Worldbuilder, let's make sure that we have everything we need. Like Worldbuilder. Follow this link if you don't have a working version of Worldbuilder yet. When you've got it up and running, let's unzip this file and add it to your Kane's Wrath install directory (by default set to C:\Program Files (x86)\Electronic Arts\Command & Conquer 3 Kane's Wrath).
Now, in your install directory, locate the file called CNC3_wb_1.0.CFG and open it with a text editor (like Notepad). Add the following line to the top of the list: add-search-path data\
Worldbuilder will now recognize these new files.
Worldbuilder is a 32-bit program that uses a maximum of 2 GB of RAM. This may often lead to OUT_OF_MEMORY_E errors that will ruin your day. Luckily, there is a tool that fixes that. You can find it here along with some documentation. Although I highly recommend it, I cannot guarantee safety, so use it at your own risk. If you do not wish to use it, then try lowering your Level Of Detail (LOD) inside Worldbuilder after the Worldbuilder has crashed, to save resources: [View], scroll down using the arrow, [Set LOD] and then select [Medium], [Low] or [Very Low]. Make sure to save your map regularly!
Planning your map
Creating a tournament map requires some planning first. Let's make a 2v2 map in a forest-like area that's medium sized. Start off in Worldbuilder by going to [File] -> [New]. Let's make it 500 units wide and 400 units high. This translates into 5000 feet in the X-direction and 4000 feet in the Y-direction. Let's set the border size to 30 and the initial height to 100.
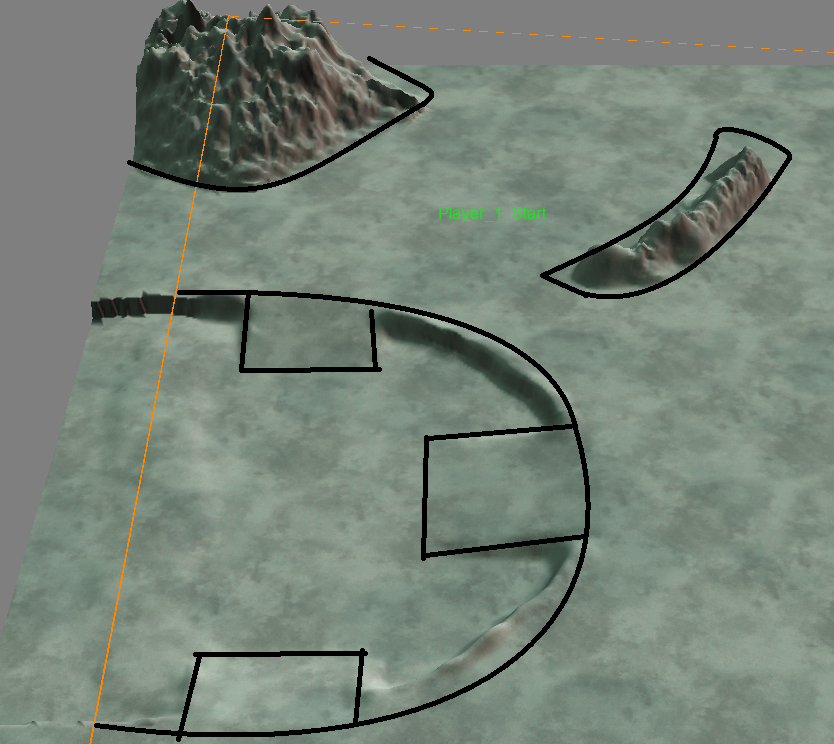
Let's draw a situation that places all 4 players, all the Tiberium fields and all the tech structures. We'll also include any heightened terrain and waterways.
Note that the map will be symmetrical, so we will have to focus on one corner, since we will just duplicate and mirror this one.
It is important that you test your map often to see if distances between players, tiberium fields, structures and tech structures are good.
Placing the map basics
Let's place a corner mountain, the big Tiberium field, the base ridge and the player position. Also make sure that the starting positions are flat, or else structure placement in-game will be a pain.
The mountain is made using the [Mound] tool . You can fiddle around with the settings to see what works for you.
The Tiberium low ground is made using the [Height Brush] tool . Set a radius and the desired height and start carving it out. I used the Mound tool to raise the edges a little bit.
You can smoothen out any rough edges using the Smooth Height tool .
Using the [Ramp] tool , you can make transitions between low and high grounds.
The ridge was made in the same way as the mountain.
Now find a place where you would like for the Construction Yard to appear. This is the starting position. Select the [Waypoint Tool] and place the waypoint. Go into [Waypoint Options] by clicking on the waypoint and select [Player_1_Start].
Under [Waypoint Location], it is important to make round numbers. My waypoint was placed at X: [689.336182] and Y:[ 3286.463867]. Let's change this to X:[700] and Y:[3300].
Alright, this corner is set up! Now for the easy part: duplicating! Also, don't forget to save your map!
Duplicating your map corner
Select the [Terrain Copy Tool] and hit [Ctrl+F] (or go to [View -> Show From Top Down View]). The goal is to select only the top left quarter of the map. Under [Selection options] use [Drag select]. Click on the top left of the map (it can be outside of the map) and drag your selection to the middle. The preview may not update correctly, but the area will be selected regardless.
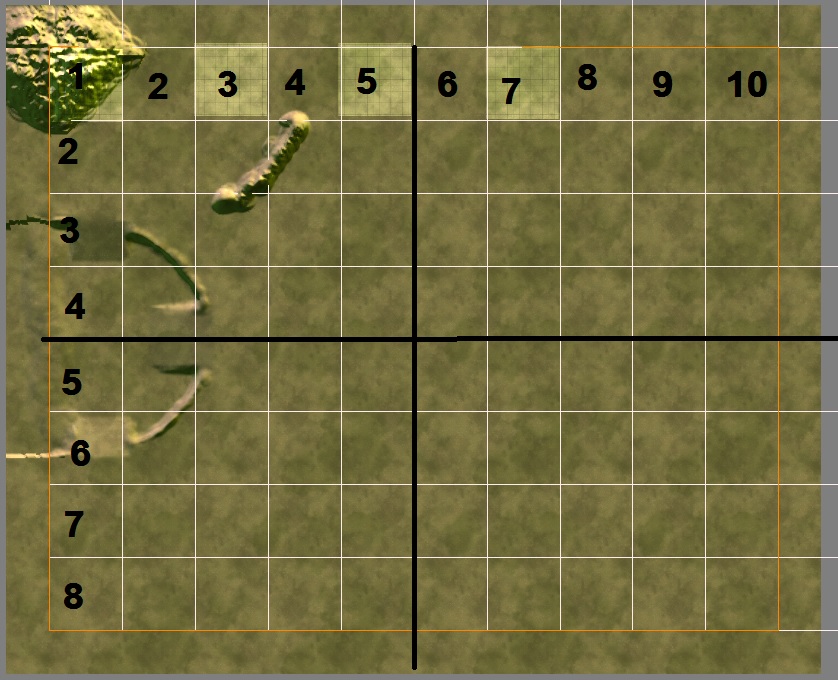
It may be a little difficult to find the middle of the map. You can open up a grid in [View] -> [Grid Settings] or [Ctrl+E]. Tick 'Show Grid' and 'Justify to 0,0'. Make sure your Z is above your map height, so let's set it to 101. Select a big spacing, like 500, and hit OK. Simply count the squares and determine the middle lines to the center.
If you're feeling tough, you can also click on the top left and drag to about the middle. Then, in the bar below the Worldbuilder, you can see the current coordinates of your mouse.
Now for the copying part. Go to [Copy mode] and select [Flip] -> [Vertically]. Leave [Rotate] at 0 degrees and enable [Copy] -> [Terrain height].
A black grid preview will pop up when you move your mouse over your screen. If you go out of top-down [CTRL+F] view, you will see a preview of the mesh (mountains etc.) as well!
Back in top-down view [CTRL+F], place the black preview under your selected area. Make sure that the bottom left corner of the preview aligns with the bottom left corner of the map.
Simply click and you will have your new mirrored corner!
From here, you can do two things:
Keep the selection and mirror it twice more, but now only [horizontally] and [horizontally and vertically].
Select the entire left half of the map and mirror it horizontally
I prefer doing the latter, because this will lead to less room for error. The more precise you are in mirroring, the more balanced the map will be.
Alright, meshes: done! Don't forget to save!
Adding the remaining players
Now let's add the remaining players. Fire up your grey matter or grab a calculator and let's do some math! Yay!
Keep in mind that the map is 5000 wide and 4000 high. The map's coordinates start on the bottom left where the border begins. Remember that [Player_1_Start] was placed at X:[700] and Y:[3300]? This was in the top left corner. Now let's add [Player_2_Start] in the bottom left corner. Their x-coordinate should be the same as Player_1, so that they are equally far away from the map border. Since the map is 4000 high and Player_1 was placed 700 feet below the top border (4000-3300=700), we can place [Player_2_Start] at X:[700] and Y:[700].
Using the same calculations, only now for the X-coordinates, we can determine that [Player_3_Start] on the top right corner must have X:[4300] and Y:[3300]. The waypoint has the same height as Player_1 (3300) and must be 700 feet away from the border (5000-700).
We can now stuff the calculator aside, as [Player_4_Start] has the same y-coordinate as [Player_2_Start] and the same x-coordinate as [Player_3_Start]: X:[4300] and Y:[700].
This is a good time to add skirmish players. Go to [Edit] -> [Edit Player List]. Press [Add Skirmish Players] and hit OK.
Player positions? Done!
Now go save your map, take a break, breathe some fresh air and post something funny on the Main Discussion forum.
Tiberium Fields
Alright, our map is finished! What? No? Oh haha, of course! We forgot to add Tiberium fields!
There are four kinds of Tiberium fields. In Worldbuilder, select Place Object [P] and navigate to ByNativeType -> Neutral -> MISC_NATURAL. Scroll down a bit and you will find different Tiberium Objects. Some are regular crystals, some are fields and some are the patches of Tiberium that appear when you destroy something. Let's place a normal green field: TiberiumField. Check back at the initial map drawing and place it roughly where we had drawn one. Make the coordinates round like we did with the waypoints so we can easily mirror them:
Tiberium fields are circular and grow from the center out. According to the map drawing, we have more of an elliptical shape to the left and right side of the map. We can make this by placing two fields near each other and having them intersect a little bit. Field 1 was placed at X:[450] and Y:[2250]. Let's place the second one on X:[450] and Y:[1750]. On the other side, let's place the top one on X:[4550] and Y:[2250] and the bottom one on X:[4550] and Y:[1750]. Now do the same for the remaining green fields: place it, round the number and then mirror it onto the other fields.
Once we're done placing the green fields, let's add the blue ones: TiberiumFieldBlue. Nothing new here, you know what to do.
Alright, now that we have placed the fields, let's jump into the settings for the green fields. Select a field and under [Object Properties], go to the [Tiberium] tab. [Radius] determines how big your field will grow. Under [View] go to [Influences] and then select [Show Tiberium Field Radius] to see how big your field can be. [Max Field Value] determines when to stop growing and [Starting Field Value] does exactly as it says: it determines how much a field has grown at the start of the game. Let's set our max value for the side fields to 50.000 and start value to 35.000. The radius is 400. Let's keep the [Field Lifetime Max] at 0 and set the [Resolution] to 40. Keep the [Cluster Factors] at 0 and set the [Growth Rate(sec)] to 10.
Make the other fields similar. To find out if a map is balanced and the field settings are they way you want them to be, you will need to play the map and see if it feels good.
If there's too much Tiberium on the map, it may result in a spammy map type where players create lots of units. If there's too little Tiberium, then we can expect boring games, because players can't build much.
Alright, now that the green fields are set up, let's set up the blue ones. These are a bit different, because we want them to start off as dry fields. Let's set the [Radius] to 200, [Max Field Value] to 25.000 and [Starting Field Value] to 1. Set the [Resolution] to 40 and set the [Growth Rate] to 30 seconds. This makes it a slow growing field that will be of more importance later in the game.
Guidelines for 1.02+ maps are:
1st Tiberium field: green Tib, radius: between 250 and 300, max and starting field value: between 30000 and 35000, field lifetime max: 0, resolution: 40 (if the radius is small, there won't be enough room for the Tiberium crystals to growth; so you need to reduce the resolution value in order to the crystals growth less spaced), cluster scale and power: 1, growth rate: 10 secs.
2nd Tiberium field: same as 1st, but with growth rate: between 8 and 5 secs (8 if there is no third Tiberium field), and starting field value may be lower to the max value.
3rd Tiberium field: same as 1st, but with growth rate: between 7 and 4 (4 only if it is a very important contested field, like in Tournament Badlands), and starting and max field value: between 20000 and 30000 (50000 if it's a contested field)
Blue Tiberium fields: max field value: 40000, starting field value: 1, growth rate: between 25 and 40 secs (better slower than faster)
(Thank you, Predatore!)
Now there's one last thing to do: Make the very center of the Tiberium field pop out! Open up [Single Tile (T)] and under [Terrain Painting Mode] tick [Visibility]. Make sure it is set to [Not visible]. Now in top-down view paint over the inside part of the TiberiumField:
Tiberium fields: done! Let's save our map! Also, don't worry about the textures you see. This will be covered below.
Adding waterways and bridges
Remember that I had drawn a waterway in the middle? Let's add that now. But Zypherbullet! We did the meshes at the beginning and mirrored it all. We can't go and add a waterway this late, can we?
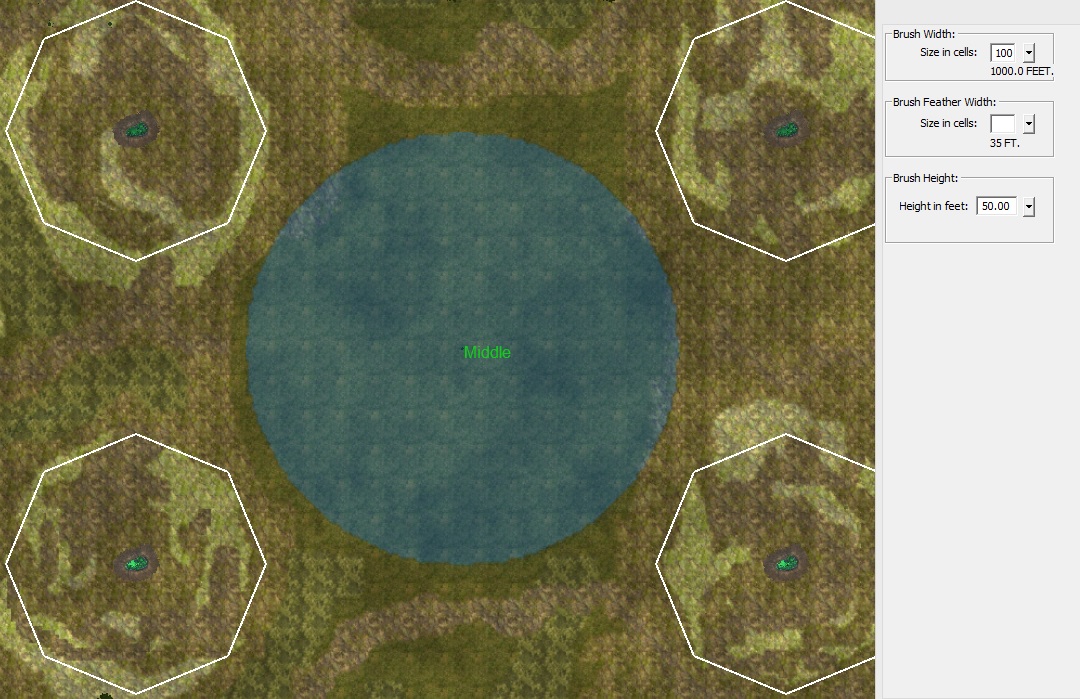
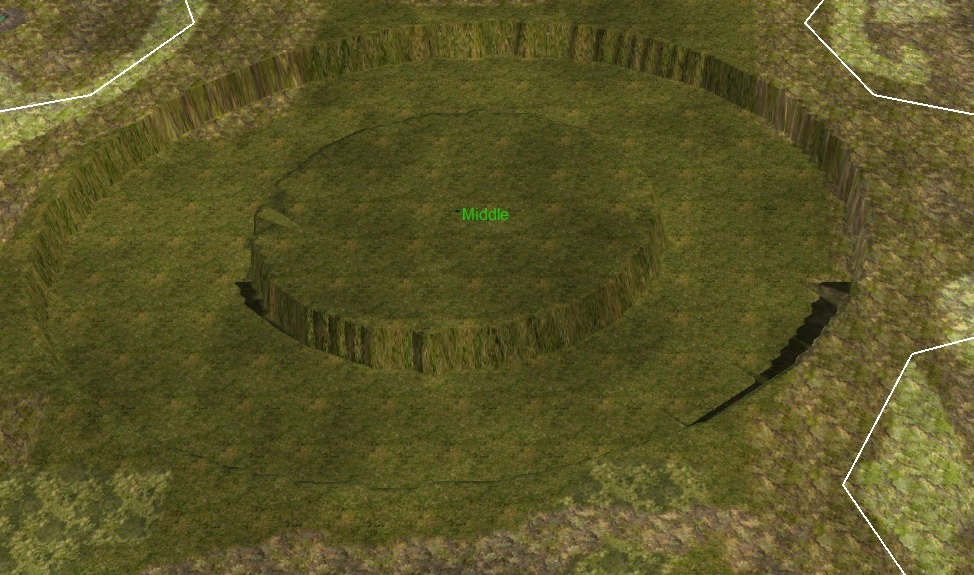
Sure we can, since it's in the middle and the [Height Brush] tool works circular. To find the middle of the map, add a waypoint and set its coordinates to X:[2500] and Y:[2000]. Now select the [Height Brush] tool, set the [Radius] to about 100 and the [Brush Height] to about 50. Zoom in on the waypoint as much as possible and place our new height in the middle of the waypoint:
Now let's set the [Brush Height] to 100 and [Radius] to 50. Do the same thing we did before to create an island:
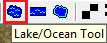
We all know an island is not an island if there's no water around it, so let's add some water. We can use the [Lake/Ocean Tool] or the [River Tool]. For this one, let's use the [Lake/Ocean Tool] . This tool requires you to add points around your waterway to make a water area. We'll make a square around our circle to cover it entirely. Let's hop into the settings to see how it works:
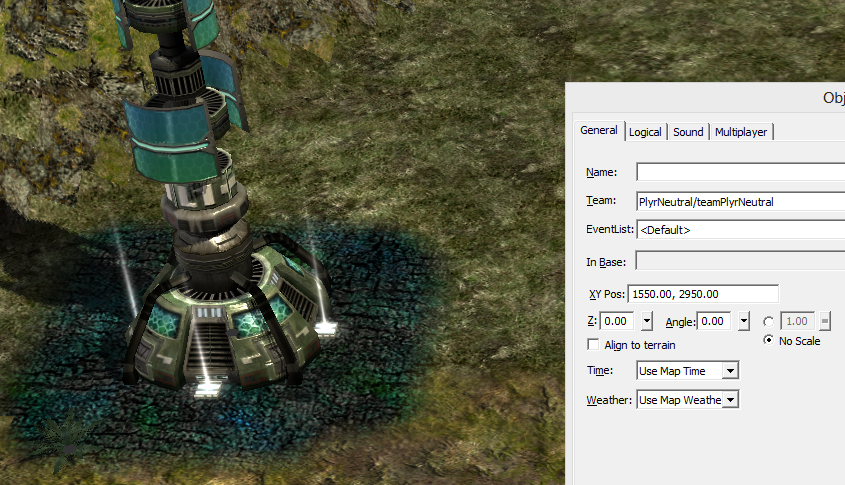
[Max Alpha Depth (ft)] determines how deep you can see, in other words, how low the transparancy goes. Increasing this softens the edges of the waterway. [Deep Water Alpha] determines the overall see through. A deep water alpha of 255 doesn't allow you to see through. Reflection does... well what you would expect it to do. It reflects things. To make the reflection interesting, you can add a skybox. Select [Place Object (P)] and navigate to ByNativeType -> Civilian -> NONE and select BlueZoneSkyA or BlueZoneSkyB or go to Neutral -> MISC_NATURAL and select BlueZoneSkyStormA. Place the skybox somewhere in the middle of your map. (Egypt Reflection Water Skybox does not work in Kane's Wrath.)
Now go and increase the water height until it soothes you. Use the [Smooth Height] tool to make the edges nice and soft. Let's also place some bridges to allow for acces to the island. Go to Place Objects -> Civilian -> STRUCTURE -> Bridge1 (or any of the other bridges). The recommended way to place bridges is to place waypoints for the start and end parts of the bridge and then placing the bridge parts over them. Again, use the coordinates settings to mirror them nicely.
DO NOT ATTEMPT TO MANUALLY ENTER COORDINATES IN THE BRIDGE OBJECT PROPERTIES - THIS WILL CRASH YOUR WORLDBUILDER!
If your waterway is somewhat transparent, I suggest painting the area below it with a texture to make it look more natural.
Tropical island in the middle of our forest with bridges? Done!
I know you're eager to try out your map and at this point you can! But if we cover the next step first, then the real testing can begin. Save the map first, though.
Tech structures
Alright, our map is almost ready for testing, so let's go and add our tech structures. These structures are found under [Place Object] -> ByNativeType -> Neutral -> STRUCTURE.
First, place the ElectroMagneticPulseControlCenter at the same spot our middle waypoint was: X:[2500], Y:[2000]. Now go and place the Tiberium Spikes and mirror the placements. Nothing new here either!
Now that this is done, you can add other tech structures as you see fit. Perhaps add some bunkers near the ramps of the side Tiberium fields to add some protection or add Defensive Towers near the EMP Control Center. We can also place a garrisonable structure near our Spikes to either defend or harass them.
Tech structures. Yeah, done! SAVE! Now let's jump into the game and start testing it out!
Testing your map
Now that we have start positions, ground meshes, waterways, tech structures and tiberium fields, it's time to test it out. You can do so against other players or against a skirmish AI. You will mostly be focussing on distances and balance now.
Play the map a few times as different factions to see if one of them gets an advantage or disadvantage. Are the tech structures too close or too far away? Remember that different factions have different scout speeds so they may cut off each other's engineers at the start. Also how about the tiberium field expansion? Can you basecrawl there or do you have to move your MCV for it?
It is important that you place the tiberium field expansions at the right distance from the opponent's field.
During your testing, you should also look out for potential places for garrisonable structures. If you can run worldbuilder and the game simulateneously, then you can just hop back and forth to edit things.
When you save the changes in worldbuilder and then restart your map, you will see that changes have been added directly. Play again and see if everything feels better now. Edit and repeat until you are fully satisfied.
Is your map playable, fair and fun?
Great! Now let's save and... o that's right, you've probably done that a million times by now. Save anyway!
Texturizing the map
Alright, we now have molded our map, added player start positions, added tech structures and garrisonables and finetuned our tiberium fields. I fear however that the map looks a tad simple, don't you agree? Let's go and add some textures!
Before we start, it is incredibly helpful to make a texture palette, so let's do that first. I'm going to keep it fairly simple for this map, but you can (and should) use many textures. You will often find that textures that belong to a certain region blend well.
Let's pick a few grasses with different coloring, two mountain textures and a Tiberium texture for our Spikes.
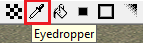
The image shows a palette by region, somewhere on the map, but I suggest making a palette outside your map boundary. This way you can easily access it and using the [Eyedropper] tool you can select the texture. You will probably be using the Eyedropper tool a lot, so take note that it pops up when you press and hold [Alt].
How you decide to paint the map is entirely up to you. I usually select one main texture that I like and then flood fill the entire map . The [Flood Fill (F)] tool replaces one texture type with your selected texture. It only replaces textures of the same kind that are connected, so you can use this to your advantage if you desire to paint only one part with that texture (like city blocks).
Now let's add some details to the map. This is again entirely up to your taste. Painting the map is a great way to add randomness to it, so let's do just that. I suggest painting a texture first and then blending the edges using [Auto Edge Out (Shift+E)] and [Auto Edge In (Alt+E)] tools . You can usually stick to using one (I prefer Auto Edge Out).
When you blend 3 or 4 textures, you are bound to come across poor blends. These are tiles that look odd. You can use the [Blend Single Edge (E)] and try to make it look better. If you use textures from the same region, poor edges may appear less noticable. Poor blends are bound to be found on nearly every map (all campaign maps have some), but since these are minor glitches, only the most awesome of worldbuilders will notice them, so don't spend too much time cleaning up the mess.
Tiberium fields are usually textured differently, due to the tainting effect of Tiberium. Under [Textures], go to [Misc], scroll down and you will find 5 Tiberium textures that you can use. Of course, you can use any texture as you see fit, like rock, dirt or even just grass. To keep things simple, I will use grass textures to make the Tiberium fields:
You can delay painting the Tiberium fields until we have placed the field objects to display their radius (see below).
Alright, ground textures: check! Also, save that map!
Placing object details and structures
Alright, we've come to the point where you have to experiment what you will wish to add to your map. Under [Object Placement], go to ByNativeType -> Civilian -> STRUCTURE and click on the very first object. Hold it over the grey 'invisible' area (beyond the map borders) and judge if it fits in your map. Using the arrow keys, move down the list until you find something that you like. Place it outside your map and repeat. Keep doing this until you hit the bottom. Now under ByNativeType -> Civilian -> MISC_MAN_MADE do the same. Once you're done, select every object, copy (or rather cut) them and paste them somewhere else (still outside your map). The reason for this is that the game doesn't recognize every structure in Worldbuilder. Only the objects that were copied properly are recognized by the game.
Now go and place the structures and objects that you like. The game can handle many objects, but may impact performance if you overdo it. For 2 player maps, you should not place more than 4500 objects. This includes trees, structures, fences etc. Also limit your road segments to about 1000.
4 player maps can handle about 3000 objects and 800 roads, while 6 player maps should not have more than 1600 objects and 500 roads. 8 Player maps should be limited to 800 objects and 300 roads. As for 10 player maps, they don't exist.
The amount of objects are stored in the bar below Worldbuilder:
This is the time to add some MISC_MAN_MADE objects around your Tech Structures and perhaps add some fancy road linings around them (more about roads below).
Make sure to mirror structures as much as possible! An easy way to do this is to create a set of objects like this:
Then under [Edit] go to [Group Edit Method] and select [As Group]. Select all of your objects that you want to duplicate and copy them. Paste them near your desired location and under [Object Properties] click the box next to [Angle] and type 90 (to turn it 90 degrees counterclockwise). Likewise, 180 degrees turns it around completely (note that this isn't a mirror!) and 270 degrees rotates it 90 degrees clockwise. To dust off your math skills: a full circle is 360 degrees (or 2π radians if you're that kind of nerd).
Object placement? Mostly done! Save the map now.
Roads
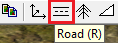
Now would be a good time to include some roads. Let's keep it simple by just adding two types of road for now: Use the [Road] tool ( R ) and start connecting the dots. For this map, DirtRoad10 and AusDirtRoad01 will do.
Let's make a main road and add some side roads to that:
As you can see, I adapted the terrain to the roads, since roads often affect the ground below them. I also placed a pavement texture below the EMP Control Center and some DefensiveTowers. (Don't mind the waterway. It may look different from yours, but that's okay.) The roads need not be mirrored, since they don't affect gameplay, but having them roughly the same on each side is not a bad thing. Again, play around with different roads and see which ones you like. You won't have something like an Eyedropper to reselect a road, so what you will want to do is deselect everything, select a road icon on the map, then deselect that and hit ( R ) to bring up the Road tool with the desired road type selected.
We are now well on our road to finishing the map! But first, let's save the map again.
Adding trees and shrubbery
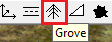
Now that nearly everything is in place, let's add some trees and shrubbery. Again, make a selection of trees and shrubbery you want to use. Select your [Grove] tool and make a selection of the trees you want to use. I'm only going to add one type of tree, the GOTtree01 from GODDARD_SPACE_CENTER_GO, but you can add any tree type that feels right.
Now start drawing boxes and look how your trees pop up. Neat! Fiddle around with the settings to see what works for you. You can always re-arrange trees by moving them with the [Select and Move] tool.
Now in the [Grove Options] replace the trees with bushes and repeat until you are satisfied. Make sure that the total percentage is 100%. This is a great way to balance your trees and shrubbery. Again, save the map.
Adding remaining objects
We're almost done placing everything. The map could still use some natural objects, like rocks around the mountains. You should now be able to do this on your own, so go nuts!
This is also a great time to add [Scorchmarks] . Select the tool and place it anywhere. Now with the scorchmark selected, under [Scorch Options], select [Scorch] and scroll through them. They should automatically update on your map. The same goes with size. The great thing about scorchmarks is that they create a degree of chaos and are visible over roads. Use to your liking.
Note that scorchmarks may have edges of other scormarks in their corners when rotated. This is a glitch and of course should be avoided. Or taken advangtage of if you're very creative.
Save the map!
Sound effects
To make our map a tad more lively, let's add sound flags. Select [Place Object] and navigate to ByNativeType -> Neutral -> AUDIO. The sound flag name gives a good indication of what it sounds like, but you can always place the flag and listen for yourself. Make sure you have enabled your sound on your computer and under [View] scroll down using the arrow, then select [Listen To Map] -> [Play Enabled Ambient Sounds]. You can place bird sounds and howling sounds near mountains, water sounds near the waterway, FieldCalm sounds around your entire map and woodcreaks in your foresty areas. Again, do as you see (or rather, hear) fit.
Object placements? Sooooo done! Now save!
Map Lighting, Post Effects, Macro Texture and Clouds
Alright, we're nearing completion of the map. Everything is in place and the map should be fully playable by now. Still, we want to make it a bit more to our taste, so let's adjust the lighting. Go to [Edit] -> [Global Light Options...] and fiddle around with the option until it is to your liking. [Ambient] determines the overall color of the map, [Sun] is the main light and [Accent 1] and [Accent 2] are similar to the sun, but more dim. The sun and both accents can have their own rotation and height setting. You can always come back and change the light settings again.
It is important that you create a light that's soothing for your eyes and looks natural.
Now let's add some Post Effects that make your map like a professional map. Under [Edit] go to [Edit Post Effects]. There are 3 usable effects: [BloomPostEffect], [LookupTablePostEffect] and [LightRaysPostEffect].
[BloomPostEffect] gives your map a flare-y look. Tinker around to see what works for you. Don't overdo it!
[LookupTablePostEffect] gives your map contrast. [Volume Textures] can be found in your install directory under Command & Conquer 3 Kane's Wrath\data\art. (Remember the one we placed at the start?) Usable files are the ones that end with _vol. For this map, let's give it a warm bluebluezone_vol and set the blend factor to a low 200. Although your map may look more beautiful with high LookUpTable settings, it may be too taxing on your eyes if you have to watch it for a long period of time.
[LightRaysPostEffect] adds lightrays to your map. Lightrays may really add a touch of beauty to your map, but again, this may be too taxing on the eyes. So for this tournament map, let's not add it.
You can play around as much as you want to see what works best. You can also go back to your lighting settings and adjust these to fit your new look!
Remember to make it as little taxing as possible!
If you can, view the map in every LOD. Go to [View], scroll down and hit [Set LOD]. Choose your LOD and then again under [View], select [Reload Textures]. If you find a level of display that looks wrong, try to adjust the settings in your post effects and repeat until it works out well.
We're almost there! Let's add a macro texture too. Go to [Edit] -> [Select Macro Texture]. Click on the options and see which one suits you. If you can't find a suitable one, enable (or disable) [Stretch]. I like the stretched tscloudmed.tga.
Now last, but not least, add a cloud texture. [Edit] -> [Select Cloud Texture]. Again, click on different textures and see which one you like. I like cm1_cloud.tga.
Don't use cm_redzonea_cloud.tga, for the above reasons.
If you're not sure if your settings are okay and don't wish to stare at your map for 6 hours for the sake of testing (nobody would blame you), then it may be wise to just steal the settings from official tournament maps. Predatore has created many tournament maps, so it is likely that you stumble across a setting that looks like yours. The easiest way to steal the settings is to open up two instances of worldbuilder, opening the Global Light Options on both maps (yours and the one you're stealing from) and then adjusting your settings to match theirs. You can do the same for Post Effects.
When you do copy someone's settings, it would be fair to credit them for it. You can also slightly adjust your settings and pretend you did it all by yourself. Whatever floats your boat.
Wew, well we are almost there! Save your map and let's get to finalizing the map.
Finalizing your map
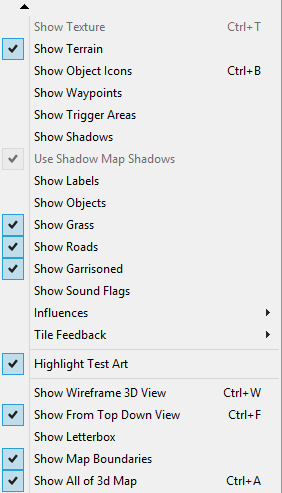
By now, you will probably have given your nearly completed map a few tries. You may have noticed a very awkward minimap... Oh dear... But fear not! We will make our own minimap, but better. Go to [File] -> [Save As] and save it with a name similar to your original, but with something like minimap behind it, to indicate that this is the file we'll use to create a minimap. First go to your [Post Effects] again and delete all of them. Remember how we painted some terrain to be invisible? Let's make them visible again (same way, but now select [Visible] instead of [Not visible]. Who would've guessed... Under [View], copy these settings:
Also make sure to [Show Water].
Then go to top down view of your map and reset the camera view (middle mouse button by default). Zoom all the way out until all borders are visible:
Now make a screenshot using Print Screen, or Prt Scn or whatever your variation on it is. If you have Photoshop, great! Open it up and paste the image there. Use the Crop tool to cut the edges right past the map boundaries. You will have to flip the image as well, because for some reason, the game reads it up side down. Now go to [Image] -> [Image Size], check [Contrstrain Proportions] and replace the biggest number (either Width or Height) by 256, then hit [OK]. Go to [File] -> [Save As] and then save it as mapname_art and as format choose Targa (*.tga). Place the new file in the same folder where your original map is.
If you don't have a copy of Photoshop, you can try free software like GIMP or just send the screenshot to me and have me do it.
Minimap: done!
Now open up the original map (the one we've been working on before we created the minimap-specific copy). Go to [Edit] -> [Edit Map Settings]. This will most likely be the hardest part: coming up with a catchy map name! This will be the name that shows up in game. When you're done, let's move on.
Leave the [Compression] at [RefPack] and the [Time] just the way it is. Set the [Weather] to something that fits your map. Let's set ours to SUNNY. We'll also set [Music Zone] to [MusicPalette_BlueZone]. Untick [Is Scenario Multiplayer] and jump over to [Fog Settings]. Enable it, choose a fog color of your liking and set the [Start] to anywhere between 400 and 1000 and the [End] between 2500 and 5000. Just try and see what works for you in game.
Under [Camera Behavior] set the [Min Height] between 170 and 200 and the [Max Height] between 420 and 435. Keep the rest as is.
In the great white box below you can add comments, like a version number, a creator name or credits to someone who helped you out (hint hint). Now save the map again!
Last touch-ups
We are almost done now! You know how everything works, so scroll around your map and maybe add textures and meshes (rough terrain etc.). You can even use Google Images to get some inspiration. Also make sure to take a look at your waterway to try different settings and textures. The latter are found in your install directory under ../data/art.
We are now done!
Alright! We did it! We finished our map and we are still breathing! Now go into the game and play it on every detail to test it. Call up your friends and try the map out, ask the community what they think (unless you're in the worldbuilding challenge!) or play against AI. Try to find as many bugs and unbalances as you can find (however hard you try, there are always bound to be some) and fix them. Then update your map, change the name to something with v2.0, so you know which is the newest version and repeat. When you feel positive that your map is the best it can be, send it off to the players of the world and go fish for compliments. You've earned them. Although... If you're feeling tough, you can add one last thing: a few scripts to enhance your map just that little bit!
Adding some basic scripts
The scripts system is something apart and can drastically change your map if you know how to use them. For our map, we'll just add some very basic scripts: birds. YES! BIRDS! Goodness gracious balls of feathers.
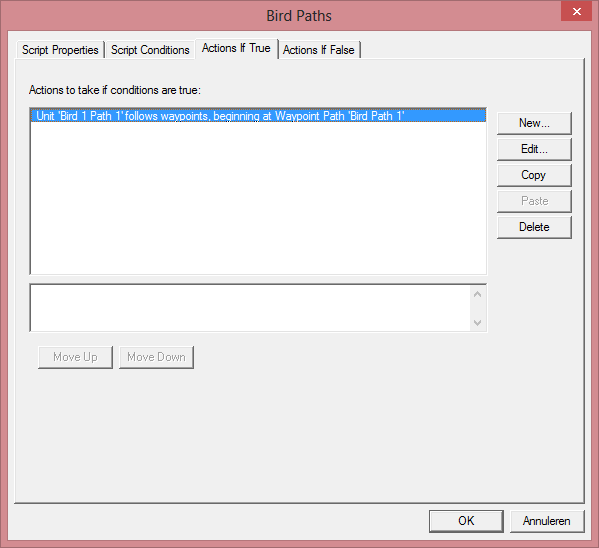
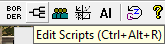
Select your [Waypoints] tool and create a path by placing and then dragging it to the next location. Repeat this until you made a full circuit. It can be spread over the entire map, because birds are free to do as they please. [Under Waypoint Path Labels:] Type your desired name for your path, like Bird Path 1. Go to [Place Object] and navigate to ByNativeType -> Civilian -> UNIT and select CUBird01. Place one near the path and call it something like Bird 1 Path 1. Now go to [Edit Scripts (CTRL+ALT+R)] . Click on the folder (neutral) and select [New Script]. Name the script something like Bird Paths. Leave the rest as is. Now under the [Script Conditions] tab, make sure that [IF] is True (which it is by default). Move on to [Actions If True] and delete [Null operation. (Does nothing.)]. Select [New...], scroll down and unfold [Unit (includes Structures) -- Action]. Unfold [Move] and choose [Unit follow a waypoint path.] In the box below, replace [Unit '???'] with the name of the bird, in our case Bird 1 Path 1. The name should pop up in the list. Now replace [Waypoint Path '???'] with the path name.
Hit [OK] and then again hit [OK].
Using the same previous steps, you can add more birds (give them different numbers) and more paths. You can have multiple birds follow the same path too! These move actions can all be activated in the same script. Their path is a looping one, so they are deemed to fly in circles for the rest of their lives. Hah!
Save your game and watch them birdies go!
Congratulations, fellow builder. You are now trained in the basic ways of the Worldbuilder, but there is yet much to learn...
Credits
A big shoutout to:
Predatore for helping me write this tutorial. He is the master of all tournaments after all! phantom9399 for organizing the challenge and putting a lot of effort into it. ToxicShock and Plokite_Wolf for proofreading and making the read more enjoyable. cnc315d34d for teaching me many things about worldbuilder
And all the others who helped me out, but who I can't seem to remember at this point. Sorry guys, but you rock anyway!


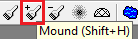 . You can fiddle around with the settings to see what works for you.
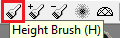 . Set a radius and the desired height and start carving it out. I used the Mound tool to raise the edges a little bit.
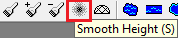 .
.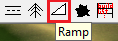 , you can make transitions between low and high grounds.
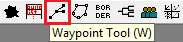 and place the waypoint. Go into [Waypoint Options] by clicking on the waypoint and select [Player_1_Start].
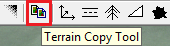 and hit [Ctrl+F] (or go to [View -> Show From Top Down View]). The goal is to select only the top left quarter of the map. Under [Selection options] use [Drag select]. Click on the top left of the map (it can be outside of the map) and drag your selection to the middle. The preview may not update correctly, but the area will be selected regardless.


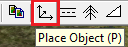 and navigate to ByNativeType -> Neutral -> MISC_NATURAL. Scroll down a bit and you will find different Tiberium Objects. Some are regular crystals, some are fields and some are the patches of Tiberium that appear when you destroy something. Let's place a normal green field: TiberiumField. Check back at the initial map drawing and place it roughly where we had drawn one. Make the coordinates round like we did with the waypoints so we can easily mirror them:

 . This tool requires you to add points around your waterway to make a water area. We'll make a square around our circle to cover it entirely. Let's hop into the settings to see how it works:

 you can select the texture. You will probably be using the Eyedropper tool a lot, so take note that it pops up when you press and hold [Alt].
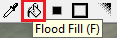 . The [Flood Fill (F)] tool replaces one texture type with your selected texture. It only replaces textures of the same kind that are connected, so you can use this to your advantage if you desire to paint only one part with that texture (like city blocks).
 . You can usually stick to using one (I prefer Auto Edge Out).
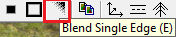 and try to make it look better. If you use textures from the same region, poor edges may appear less noticable. Poor blends are bound to be found on nearly every map (all campaign maps have some), but since these are minor glitches, only the most awesome of worldbuilders will notice them, so don't spend too much time cleaning up the mess.


 and start connecting the dots. For this map, DirtRoad10 and AusDirtRoad01 will do.
 and make a selection of the trees you want to use. I'm only going to add one type of tree, the GOTtree01 from GODDARD_SPACE_CENTER_GO, but you can add any tree type that feels right.
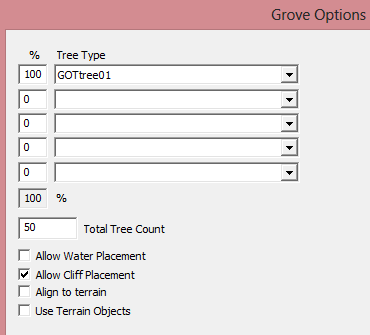
 . Select the tool and place it anywhere. Now with the scorchmark selected, under [Scorch Options], select [Scorch] and scroll through them. They should automatically update on your map. The same goes with size. The great thing about scorchmarks is that they create a degree of chaos and are visible over roads. Use to your liking.
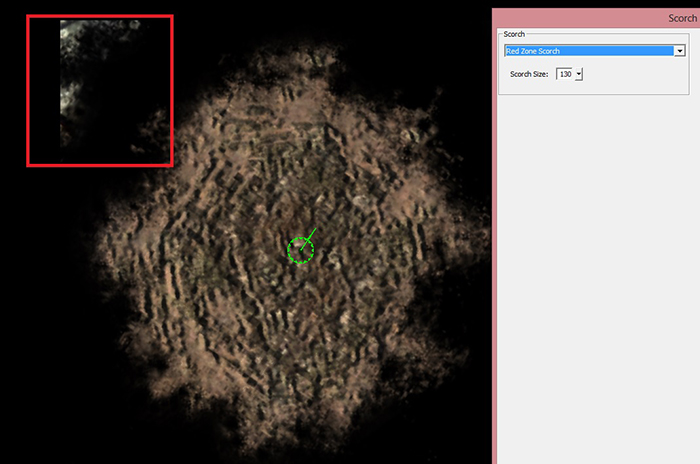


 . Click on the folder (neutral) and select [New Script]. Name the script something like Bird Paths. Leave the rest as is. Now under the [Script Conditions] tab, make sure that [IF] is True (which it is by default). Move on to [Actions If True] and delete [Null operation. (Does nothing.)]. Select [New...], scroll down and unfold [Unit (includes Structures) -- Action]. Unfold [Move] and choose [Unit follow a waypoint path.] In the box below, replace [Unit '???'] with the name of the bird, in our case Bird 1 Path 1. The name should pop up in the list. Now replace [Waypoint Path '???'] with the path name.